How To Sight in a Red Dot Like a Pro

Ammo Inc. 300 Blackout 150 Grain Full Metal Jacket- 1000 Rounds

$42.75
VIEW OPTIONS

Federal American Eagle 300 AAC Blackout 220 Grain Subsonic Open Tip Match

$42.75
VIEW OPTIONS

Federal American Eagle 300 AAC Blackout 150 Grain Full Metal Jacket Boat Tail

$42.75
VIEW OPTIONS

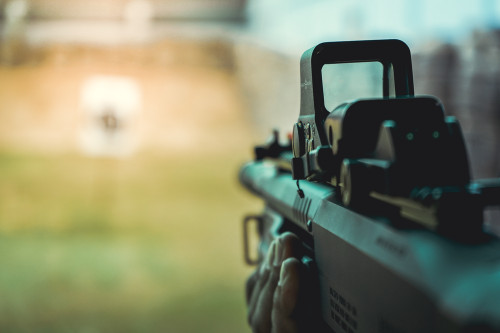
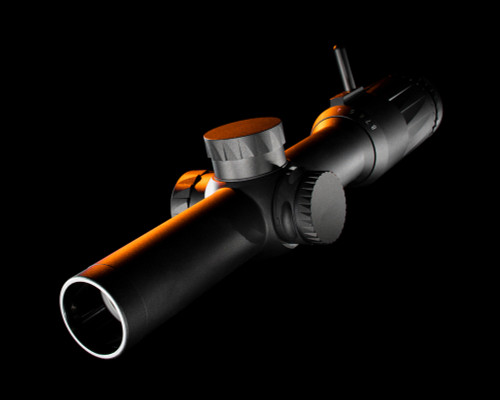
So, you just picked up a brand new red dot sight. You take it out of the package, turn it on, and study the cool little reticle floating around in the glass. You’re ready to mount it to your favorite firearm and start clearing rooms like the tactical genius you are — but how exactly do you get it on the gun?

You can’t just slide the red dot on your firearm and start blasting. You can’t just duct tape it either. A firearm is a precision instrument, and to work it effectively, you’ll need to mount and calibrate it properly. This means zeroing your optic to ensure it matches your gun’s point of aim.

Whether it’s your first time or you’re just here for a refresher, let’s break down how to mount and zero your red dot step by step.

Necessary Equipment and Tools

Before you mount or zero your dot, you’ll assemble your tools. It’s what a chef refers to as “mies en plas.” Fortunately, most of what you need comes with the red dot itself. You’ll generally find the following in the product box:

  • Mounts: Most rifle red dots come with a mount. Pistol red dots may need a special type of mount called an adapter plate depending on its footprint. We’ll take a closer look at those later in this post.
  • Risers: All shooters aren’t the same size. Risers help you adjust how high your optic sits over the bore of your gun. They’re often used with AR setups.
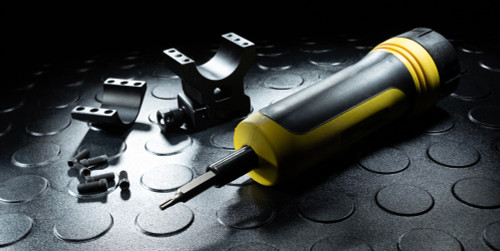
  • Tools: You’ll attach your optic to its mount with screws, which usually feature a hex (6-sided) or Torx (star-shaped) head. These tools will often come with your optic but if they don’t, you’ll need to pick them up yourself.
  • Battery: Optics usually come with a single battery (but you might have to purchase one). Button batteries are the most common in red dots.

You’ll also need:

  • Thread Locker: If your optic/mount came with an instruction manual, check to see if it mentions anything about using a thread locker. Unless the manual explicitly says not to use thread locker, you should definitely put a dab on the screws that hold your optic to the mount. These will keep the threads from slowly walking back after the repeated whiplash of shooting. Blue Loctite often works best for this application because it won’t be impossible to remove if you ever want to detach the optic and mount later.
  • Flathead Screwdriver: You may need this to adjust windage and elevation on your red dot.
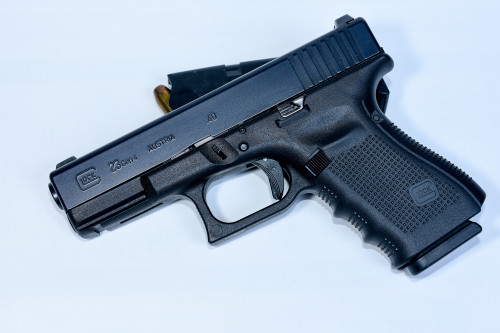
  • Optic Mounting Plate: Tomount a red dot to a pistol, you may need a mounting plate. Pistol slides are generally milled to one type of red dot “footprint.” If the red dot you want to mount to your pistol doesn’t have the footprint the slide is milled for, you’ll need an optic plate. These slabs of metal are adapters that allow you to attach an optic that doesn’t share your slide’s footprint.

Once you get your tools together, it’s time to move on to the next steps.

How To Sight in a Red Dot Scope

Mounting and zeroing a red dot is pretty easy once you get the hang of it. First, securely mount your dot to your pistol’s slide. Then, hit your local range to get some hands-on testing.

Step 1: Mounting the Red Dot Sight Properly

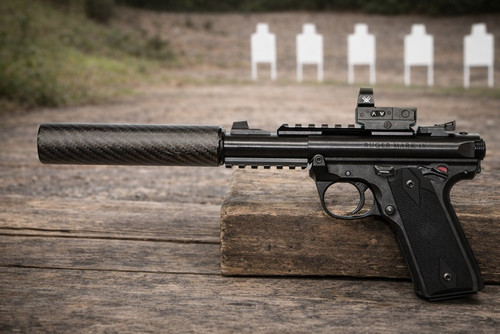
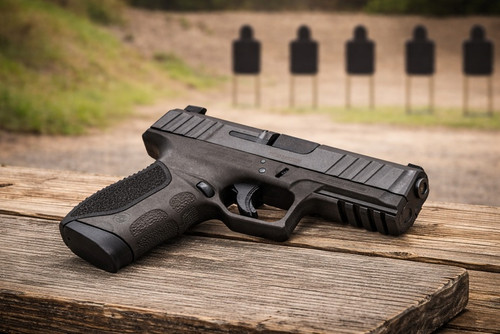
If you’re attaching your red dot to an AR-pattern rifle, you’ll probably use a picatinny rail mount. Pistol red dots will mount either directly to the pistol’s slide or onto one of the adapter plates we mentioned earlier.

With a cotton swab, put a small dab of threadlocker in a line across the threading of the screw that attaches the optic to the mount. Don’t go overboard — a little goes a long way.

Once you’ve attached the optic to the mount, it’s time to mount it to the gun. For rifle red dots, this will involve finding a spot on a picatinny rail. Pistol optics will screw either directly onto the slide or to a plate (which will then screw to the slide). Regardless, make sure you tighten down the mounting screws. This will likely involve the hex or Torx wrench we mentioned earlier.

One of the cool things about red dots is that they have infinite eye relief, so your eye’s distance from the optic won’t change your sight picture. As a result, you can mount a red dot at any distance you find comfortable.

Step 2: Hit the Range

Next, it’s time to send some lead downrange. Fortunately, you don’t need a very specialized range to sight a red dot.

You don’t even need a range with a ton of distance. The standard range to zero a rifle red dot is 50 yards, while a pistol is 25-35 yards. You won’t be aiming much farther than that anyway, since red dots don’t have any magnification (without adding extra accessories).

However, if you’re zeroing a red dot on a rifle, make sure the range allows you to shoot rifle-caliber cartridges. Additionally, if you’re shooting at an indoor range, steel cased/steel core ammo may be a no-no.

PRO TIP: Boresighting

While other sighting methods work just fine, using a bore sight to align your red dot sight can save you a ton of time, effort, and ammunition. Bore sight tools are available in different configurations, and it’s not hard to find one that meets your preferences. Some attach magnetically to the muzzle, emitting a laser to establish a point of aim. More precise models insert into the barrel, and others project visible targets for accuracy at short distances.

Before you start this process, make sure your optic is level with the firearm's receiver. This helps minimize shot deviation. Next, determine your sighting distance. Typically, you’ll want to sight in at 10 yards in order to adjust for the height difference between the sight and the barrel (height over bore). To do this, place the bore sight in the barrel and maneuver the reticle so that the point of aim matches a point on the target that is four inches above where the bore sight projects at 10 yards. This will account for bullet rise over 25 yards, ultimately placing it close to the target at 100 yards.

When bore sighting a pistol (or rifle), it's best to use a "bench rest" setup. Remain seated with the pistol on a table supported by a sandbag or stand. Don’t try to sight the pistol "offhand" (standing). Without a rest, it can be tough to trust the accuracy of your groupings and make it nearly impossible to align your red dot.

Once you've used the bore sight to ensure your firearm is on target within the your red dot's sight picture, follow the remaining steps.

Step 3: Aligning the Reticle With the Target

Now you get to pull the trigger. When you’re sighting in a red dot, shoot from some kind of rest whenever possible. This minimizes the effects of your own movement on the gun’s accuracy. You can sit and shoot the gun from a table, use a sandbag, or get creative to ensure a steady shot.

Whenever zeroing a red dot, use targets printed with 1-inch squares. This will make the next step a lot less of a headache, as you’re going to make adjustments based on how many squares your point of aim was from where your shots were landing.

Next, line up the dot of your reticle with a target. Take a deep breath, exhale, then fire three rounds.

Step 4: Adjust for Windage and Elevation

Set your firearm back to “safe” and head downrange (when clear) to see where your shots landed. They should be in a fairly noticeable group.

Point your firearm at your original point of aim. Adjust the elevation and windage knobs to move your reticle. Maneuver it towards where the shots were landing on the target. For example, if your group was 3 inches down and 3 inches to the right, adjust your red dot until the reticle is aiming at the center of your target.

Each individual red dot will tell you how much each click adjusts the reticle in its user manual. Most red dots use MOA, or minutes of angle for adjustment. However, others use MRAD (milliradians). Adjusting both of these reticles is essentially the same, but each click will change the amount that the point of aim moves in different ways.

Step 5: Test and Repeat

Now that you’ve adjusted your red dot, take three more shots and see where they land. If you’re still missing the target, make new adjustments and shoot another group. Repeat until you’re happy with your sight’s accuracy.

Tips for Maximizing Your Red Dot’s Accuracy

Following the basic process above will get you most of the way there, but you can make things a whole lot easier by following these additional tips.

1. Pick a Good Red Dot

A subpar red dot won’t do you much good. First and foremost, high-quality optics have super-clear sight pictures. Lower-quality red dots may exhibit image distortion the further away you get from the center of the optic.

Low-quality red dots are also prone to problems like delamination, a serious issue where layers of the optic pull away from each other and cause bubbles or lines to form. Once delamination starts, your red dot is as good as broken. It’s sort of like cracks in your car’s windshield.

Long story short, you need a good quality sight with clear glass and good battery life. Otherwise, it won’t be worth buying. So fork up the cash for something you can actually rely on to improve accuracy and quicken target acquisition.

2. Adjust Your Brightness

Red dots have multiple brightness options to compensate for ambient light. Use the right brightness setting for your shooting conditions. If you keep your dot too dim during the daytime, you won’t be able to make out your reticle. Too bright at night, and it’ll be the only thing you can see.

Experiment with your red dot in varying conditions to find the best brightness settings for different scenarios.

3. Get a Magnifier

Since red dots have no inherent magnification, you’ll need to add another optic to get a closer look at your target. You can attach a magnifier behind the red dot and flip it down to remove magnification as the situation demands.

Magnifiers are only applicable to rifles equipped with red dots. Pistols don’t have the real estate to add a magnifier, and you shouldn’t be shooting a pistol out to a range where you need a magnifier, anyway.

4. Practice

As an Army Ranger we know once said, “Shooting is a perishable skill.” All of the epic gear in the world won’t help you hit the broad side of a barn without practice. In fact, a red dot actually complicates your weapon platform. You don’t want to be bumbling around trying to aim your red dot in a crisis scenario. That’s why it’s important to have a dynamic shooting routine and constantly work on improving your skills.

Final Thoughts

Once you make the jump from iron sights to red dots, you’ll wonder how you got this far without one. But you also need to sight your gun in properly when using any kind of optic. As long as you follow the steps we outlined here, your gun will be a tackdriver out to 100 yards.

Looking for a quality red dot at a great price? Give your gun what it really deserves. Pro Armory has a great selection of red dots, holographic sights, and other optics that you can afford. Check these out along with other great deals on tactical gear and ammo to take your firearm to the next level.

Looking for handgun safety and tactical training? Pro Armory offers online courses to help improve your skills. Sign up for our newsletter to be notified when training officially launches.

--> --> -->
Ammo Inc. 300 Blackout 150 Grain Full Metal Jacket- 1000 Rounds

$42.75
VIEW OPTIONS

Federal American Eagle 300 AAC Blackout 220 Grain Subsonic Open Tip Match

$42.75
VIEW OPTIONS

Federal American Eagle 300 AAC Blackout 150 Grain Full Metal Jacket Boat Tail

$42.75
VIEW OPTIONS

Supporting Veterans

Supporting Veterans

Veteran Operated

Veteran Operated

Speedy Shipping

Speedy Shipping

Security

Security is Our Priority

How To Sight in a Red Dot Like a Pro

How To Sight in a Red Dot Like a Pro

29th Dec 2023

So, you just picked up a brand new red dot sight. You take it out of the package, turn it on, and study the cool little reticle floating around in the glass. You’re ready to mount it to your favorite firearm and start clearing rooms like the tactical genius you are — but how exactly do you get it on the gun?

You can’t just slide the red dot on your firearm and start blasting. You can’t just duct tape it either. A firearm is a precision instrument, and to work it effectively, you’ll need to mount and calibrate it properly. This means zeroing your optic to ensure it matches your gun’s point of aim.

Whether it’s your first time or you’re just here for a refresher, let’s break down how to mount and zero your red dot step by step.

Necessary Equipment and Tools

Before you mount or zero your dot, you’ll assemble your tools. It’s what a chef refers to as “mies en plas.” Fortunately, most of what you need comes with the red dot itself. You’ll generally find the following in the product box:

  • Mounts: Most rifle red dots come with a mount. Pistol red dots may need a special type of mount called an adapter plate depending on its footprint. We’ll take a closer look at those later in this post.
  • Risers: All shooters aren’t the same size. Risers help you adjust how high your optic sits over the bore of your gun. They’re often used with AR setups.
  • Tools: You’ll attach your optic to its mount with screws, which usually feature a hex (6-sided) or Torx (star-shaped) head. These tools will often come with your optic but if they don’t, you’ll need to pick them up yourself.
  • Battery: Optics usually come with a single battery (but you might have to purchase one). Button batteries are the most common in red dots.

You’ll also need:

  • Thread Locker: If your optic/mount came with an instruction manual, check to see if it mentions anything about using a thread locker. Unless the manual explicitly says not to use thread locker, you should definitely put a dab on the screws that hold your optic to the mount. These will keep the threads from slowly walking back after the repeated whiplash of shooting. Blue Loctite often works best for this application because it won’t be impossible to remove if you ever want to detach the optic and mount later.
  • Flathead Screwdriver: You may need this to adjust windage and elevation on your red dot.
  • Optic Mounting Plate: Tomount a red dot to a pistol, you may need a mounting plate. Pistol slides are generally milled to one type of red dot “footprint.” If the red dot you want to mount to your pistol doesn’t have the footprint the slide is milled for, you’ll need an optic plate. These slabs of metal are adapters that allow you to attach an optic that doesn’t share your slide’s footprint.

Once you get your tools together, it’s time to move on to the next steps.

How To Sight in a Red Dot Scope

Mounting and zeroing a red dot is pretty easy once you get the hang of it. First, securely mount your dot to your pistol’s slide. Then, hit your local range to get some hands-on testing.

Step 1: Mounting the Red Dot Sight Properly

If you’re attaching your red dot to an AR-pattern rifle, you’ll probably use a picatinny rail mount. Pistol red dots will mount either directly to the pistol’s slide or onto one of the adapter plates we mentioned earlier.

With a cotton swab, put a small dab of threadlocker in a line across the threading of the screw that attaches the optic to the mount. Don’t go overboard — a little goes a long way.

Once you’ve attached the optic to the mount, it’s time to mount it to the gun. For rifle red dots, this will involve finding a spot on a picatinny rail. Pistol optics will screw either directly onto the slide or to a plate (which will then screw to the slide). Regardless, make sure you tighten down the mounting screws. This will likely involve the hex or Torx wrench we mentioned earlier.

One of the cool things about red dots is that they have infinite eye relief, so your eye’s distance from the optic won’t change your sight picture. As a result, you can mount a red dot at any distance you find comfortable.

Step 2: Hit the Range

Next, it’s time to send some lead downrange. Fortunately, you don’t need a very specialized range to sight a red dot.

You don’t even need a range with a ton of distance. The standard range to zero a rifle red dot is 50 yards, while a pistol is 25-35 yards. You won’t be aiming much farther than that anyway, since red dots don’t have any magnification (without adding extra accessories).

However, if you’re zeroing a red dot on a rifle, make sure the range allows you to shoot rifle-caliber cartridges. Additionally, if you’re shooting at an indoor range, steel cased/steel core ammo may be a no-no.
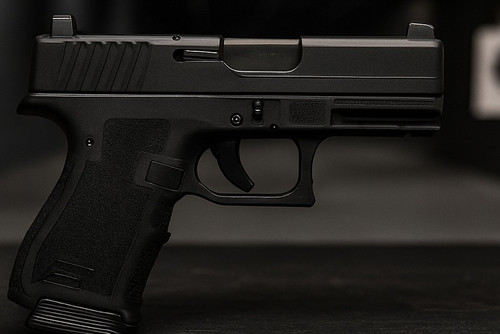
PRO TIP: Boresighting

While other sighting methods work just fine, using a bore sight to align your red dot sight can save you a ton of time, effort, and ammunition. Bore sight tools are available in different configurations, and it’s not hard to find one that meets your preferences. Some attach magnetically to the muzzle, emitting a laser to establish a point of aim. More precise models insert into the barrel, and others project visible targets for accuracy at short distances.
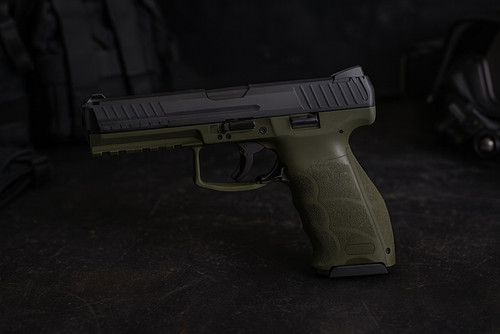
Before you start this process, make sure your optic is level with the firearm's receiver. This helps minimize shot deviation. Next, determine your sighting distance. Typically, you’ll want to sight in at 10 yards in order to adjust for the height difference between the sight and the barrel (height over bore). To do this, place the bore sight in the barrel and maneuver the reticle so that the point of aim matches a point on the target that is four inches above where the bore sight projects at 10 yards. This will account for bullet rise over 25 yards, ultimately placing it close to the target at 100 yards.

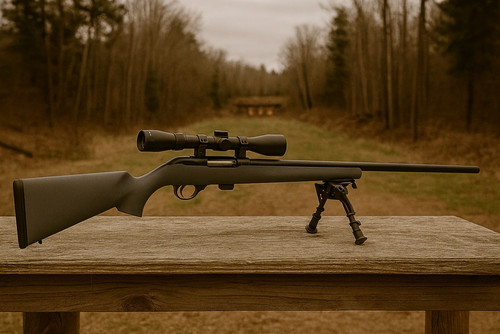
When bore sighting a pistol (or rifle), it's best to use a "bench rest" setup. Remain seated with the pistol on a table supported by a sandbag or stand. Don’t try to sight the pistol "offhand" (standing). Without a rest, it can be tough to trust the accuracy of your groupings and make it nearly impossible to align your red dot.

Once you've used the bore sight to ensure your firearm is on target within the your red dot's sight picture, follow the remaining steps.

Step 3: Aligning the Reticle With the Target

Now you get to pull the trigger. When you’re sighting in a red dot, shoot from some kind of rest whenever possible. This minimizes the effects of your own movement on the gun’s accuracy. You can sit and shoot the gun from a table, use a sandbag, or get creative to ensure a steady shot.

Whenever zeroing a red dot, use targets printed with 1-inch squares. This will make the next step a lot less of a headache, as you’re going to make adjustments based on how many squares your point of aim was from where your shots were landing.

Next, line up the dot of your reticle with a target. Take a deep breath, exhale, then fire three rounds.

Step 4: Adjust for Windage and Elevation

Set your firearm back to “safe” and head downrange (when clear) to see where your shots landed. They should be in a fairly noticeable group.

Point your firearm at your original point of aim. Adjust the elevation and windage knobs to move your reticle. Maneuver it towards where the shots were landing on the target. For example, if your group was 3 inches down and 3 inches to the right, adjust your red dot until the reticle is aiming at the center of your target.

Each individual red dot will tell you how much each click adjusts the reticle in its user manual. Most red dots use MOA, or minutes of angle for adjustment. However, others use MRAD (milliradians). Adjusting both of these reticles is essentially the same, but each click will change the amount that the point of aim moves in different ways.

Step 5: Test and Repeat

Now that you’ve adjusted your red dot, take three more shots and see where they land. If you’re still missing the target, make new adjustments and shoot another group. Repeat until you’re happy with your sight’s accuracy.

Tips for Maximizing Your Red Dot’s Accuracy

Following the basic process above will get you most of the way there, but you can make things a whole lot easier by following these additional tips.

1. Pick a Good Red Dot

A subpar red dot won’t do you much good. First and foremost, high-quality optics have super-clear sight pictures. Lower-quality red dots may exhibit image distortion the further away you get from the center of the optic.

Low-quality red dots are also prone to problems like delamination, a serious issue where layers of the optic pull away from each other and cause bubbles or lines to form. Once delamination starts, your red dot is as good as broken. It’s sort of like cracks in your car’s windshield.

Long story short, you need a good quality sight with clear glass and good battery life. Otherwise, it won’t be worth buying. So fork up the cash for something you can actually rely on to improve accuracy and quicken target acquisition.

2. Adjust Your Brightness

Red dots have multiple brightness options to compensate for ambient light. Use the right brightness setting for your shooting conditions. If you keep your dot too dim during the daytime, you won’t be able to make out your reticle. Too bright at night, and it’ll be the only thing you can see.

Experiment with your red dot in varying conditions to find the best brightness settings for different scenarios.

3. Get a Magnifier

Since red dots have no inherent magnification, you’ll need to add another optic to get a closer look at your target. You can attach a magnifier behind the red dot and flip it down to remove magnification as the situation demands.

Magnifiers are only applicable to rifles equipped with red dots. Pistols don’t have the real estate to add a magnifier, and you shouldn’t be shooting a pistol out to a range where you need a magnifier, anyway.

4. Practice

As an Army Ranger we know once said, “Shooting is a perishable skill.” All of the epic gear in the world won’t help you hit the broad side of a barn without practice. In fact, a red dot actually complicates your weapon platform. You don’t want to be bumbling around trying to aim your red dot in a crisis scenario. That’s why it’s important to have a dynamic shooting routine and constantly work on improving your skills.

Final Thoughts

Once you make the jump from iron sights to red dots, you’ll wonder how you got this far without one. But you also need to sight your gun in properly when using any kind of optic. As long as you follow the steps we outlined here, your gun will be a tackdriver out to 100 yards.

Looking for a quality red dot at a great price? Give your gun what it really deserves. Pro Armory has a great selection of red dots, holographic sights, and other optics that you can afford. Check these out along with other great deals on tactical gear and ammo to take your firearm to the next level.

Looking for handgun safety and tactical training? Pro Armory offers online courses to help improve your skills. Sign up for our newsletter to be notified when training officially launches.