As a beginner handgun shooter, it’s easy to get overwhelmed by all the important (and sometimes contradictory) information floating around. The fact is, all you have to do is line up the sights, then squeeze the trigger without disturbing the gun. Handgun marksmanship seems simple, right?

It may be simple in theory, but it still takes a lot of practice. You can learn the basics in a day, then spend a lifetime mastering this skill. The goal is not only knowing how to shoot a handgun but also to have good marksmanship ingrained so deeply in your muscle memory that you perform well automatically — even under extreme stress.

Achieving this goal begins with the basics. Let’s break the seven fundamentals of handgun shooting down into 26 actionable tips, so you can get to work building the skills you need to make yourself and everyone around you safer.

Tips for Handgun Marksmanship

The fundamentals of marksmanship are the same whether you’re firing a single-shot derringer or a .50 caliber sniper rifle. But while a rifle tends to be more accurate due to its size and length (making it easier to control), the main challenge of handgun shooting is the weapon’s small size and comparative instability. Your arms, legs, torso, and grip have to create a platform to make up for this lack of stability. Otherwise, the fundamentals of shooting remain the same.

For simplicity, we’re going to avoid dealing with tactical application (e.g., draw stroke) and just focus on hitting what you’re aiming at. We have to crawl before we can walk, so we’ll save tactical application for another article.

Here’s a collection of our best tips for shooting handguns, divided by the fundamental disciplines of handgun shooting.

Safety

Before we begin, let’s cover safety. Heard this before? Good. Hopefully, you hear it every single time you go to the range and think about it every time you look at a gun. Never forget these are deadly weapons. The moment you become complacent and lose respect for the gun, you’ll make a mistake you can’t undo.

1. Treat all guns as if they are loaded. Know the status of the gun at all times. Even if you know the gun is not loaded, you should still treat it as if it is. The goal is to build unconscious safety habits.

2. Always keep the barrel pointed in a safe direction. In other words, never point the gun at something you don’t want to destroy. Forget what you know and allow the unconscious habit to develop.

3. Always be sure of your target and beyond. It’s not enough to be situationally aware of the gun. You have to know where you’re shooting, what you’re shooting at, and what’s beyond it. Already checked it last time? Check it again.

4. Keep your finger off the trigger until you’re ready to shoot. Remember, the gun can’t go off on its own. Stories of people tripping and shooting a friend or accidentally shooting themselves in the leg while holstering are not freak accidents. This happens when you have your finger on the trigger when you shouldn’t. Don’t be that person.

Breathing

Remember to breathe. This might seem ridiculous, but under extreme (or even moderate) stress, people tend to hold their breath. Combined with the effects of adrenaline, it can be extremely exhausting. This is part of the reason why combat sports are so taxing — many athletes are holding their breath!

5. Take deep breaths: When shooting a handgun, it’s important to breathe properly so you can think clearly and shoot accurately. Just before you shoot, take an exaggerated deep breath to make sure you’re consciously breathing. It might feel absurd, but it works. Make it a habit.

6. Remember, you’re not a sniper: You’re not trying to make a mile-long shot where a single breath can affect sight alignment. More often, you’re training for a gunfight at seven yards. In that situation, you can’t pass out, get tunnel vision, or otherwise allow the effects of adrenaline to wreak havoc on your body. Breathing is the best way to mitigate these effects.

Stance

When beginners are taught to shoot, they’re usually presented with several stance options bearing names like Weaver, Isosceles, Chapman, etc. While these are useful frameworks for developing your own shooting stance, there is a more fundamental way to look at this:

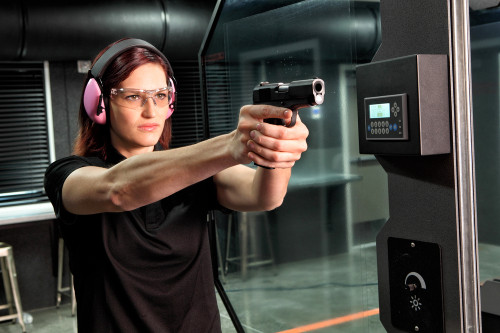
7. Just stand up: The simplest way to find a good stance for shooting is to stand braced like someone is going to toss you something. Don’t overcomplicate it. In time, you’ll refine your stance to suit your needs.

8. Stay balanced: Remember, this is a fighting position. Don’t lean too far back or too far forward or otherwise do anything that feels strange. A balanced stance is the right place to begin, then you can adjust over time.

Grip

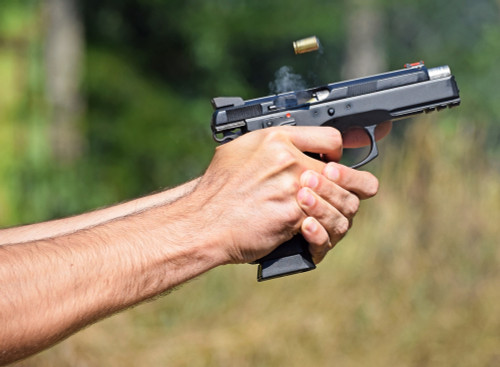
When the gun fires, it will recoil. To maintain accuracy, you need a solid grip to manage that recoil and put you in an optimal position for follow-on shots.

9. Grip high: With your shooting hand, grip the gun as close to the slide as possible. There is a groove there for this purpose. Remember, all the movement is at the top of the gun as the slide cycles. If your grip is too low and/or too loose, the gun will flop around, making it much more difficult to realign your sights for a follow-on shot.

10. Use your support hand: Your support hand, tilted at 45 degrees, will fill in all the empty space that may otherwise allow the gun to recoil harshly. Your thumbs will align along the slide, stacked on top of each other.

11. Try a clamshell grip: Clamp your hands together like a clamshell, tight enough to limit recoil, but not so tight your forearm muscles start cramping or shaking. You’re trying to hold the gun as tightly as you can, but you’re not trying to smash it.

12. Keep your finger off the trigger: Your index finger should rest straight along the side of the gun, outside the trigger guard. Once you start doing this regularly, you’ll notice movie and TV characters cluelessly running around with their fingers on the triggers. Don’t be like them.

13. Forearm alignment: You want to be sure the gun aligns with your forearm on your shooting hand. The force of the gun is coming straight backward, so you want it to be absorbed by a straight arm. Don’t pivot the gun in one direction or another.

Sight Picture

Your body position and grip are set. Now, you need to aim. Along the top of the gun, you’ll find the sights. The rear sight is like a “U,” and the front sight is like an “I.”

14. Align the sights: The goal is to put the “I” in the center of the “U,” then make sure they align across the top. If all goes well, your shot will hit at the top of the “I.”

15. Front sight focus: When aiming, you must focus on the front sight. This might seem counterintuitive at first, but this is how it’s done. This means the target and the rear sight will be blurry in your vision. Only the front “I” will be in focus.

16. Shoot with both eyes: At first, you can aim with one eye closed, but eventually you may develop the ability to shoot with both eyes open. This is important for tactical applications. Fighting with one eye closed is not a good idea. That said, eye dominance can make this somewhat difficult, so don’t be discouraged if you aren’t able to do it right away.

Trigger Control

You have a good sight picture, and you’re ready to fire. If we could magically will the bullet out of the gun, we’d have a bullseye. Unfortunately, it’s not that simple. Instead, we have to activate the trigger without disturbing the sights, which is where most beginners go wrong. Here are some tips to mitigate that mistake:

17. Find your finger position: How, exactly, the finger rests on the trigger depends on biology to some extent. Some people say to use the first finger bone, others the second. Too much finger, and your shots will pull to the right. Too little, and your shots will push to the left. Find the finger position that puts your shots in the middle.

18. Squeeze the trigger: We say “pull” the trigger, but it really needs to be a squeeze straight backward. A slight yank in either direction could throw off your sight alignment. Your shot groupings can usually indicate if you are yanking the trigger one way or the other.

19. Mind the slack: The gun doesn’t fire instantly when you touch the trigger. Instead, triggers always have some slack that must first be taken up before the hammer activates. You’ll feel it as a resting point where any additional pressure will fire the gun.

20. Don’t anticipate your shots: As you’re squeezing the trigger, your shot should come as a surprise. Any anticipation could throw off your sight alignment. It’s common to do everything right up until this point, then throw off your shot with a tiny flinch a millisecond before the hammer drops. Let your shots surprise you.

Follow-Through

The engagement doesn’t end after your first shot. While this might not technically be marksmanship, it’s important for developing the basis of tactical proficiency.

21. Check results through your sights: Your instinct will be to lower the gun and see if you hit the target. This is a bad habit. What if you missed, and that goblin is still coming at you? You must learn to realign and check your work through your sights so you’re ready for follow-on shots.

22. Reset the trigger: After your shot, don’t completely remove your finger from the trigger. This will increase the amount of time needed for follow-on shots. Instead, just release the trigger until it resets at the resting point. You’re now in an optimal position to shoot again if necessary.

23. Remove your finger from the trigger: When you are done shooting, remove your finger from the trigger and return it to the index position along the side of the gun. Return the gun to a ready position.

Practice With Dry Fire

Almost everything described above can be practiced without firing live ammo. This is critical to log the thousands of reps required to make these actions habitual and commit them to muscle memory. If you don’t have the time or resources to develop these habits explicitly through range time, dry fire training is the next best option.

The act of carrying a gun doesn’t mean you’re armed. Being armed means being competent and proficient with your gun. As gun owners, it is our responsibility to meet (and ideally exceed) this standard.

Remember, you’re only as good as your training. Under the extreme stress of a fight for your life, you will not be able to think about these details. You will not rise to the occasion — you will default to the level of your training. If you haven’t trained, you’ll likely crumble under the pressure, failing to defend yourself and others.

Dry Fire Training Tips

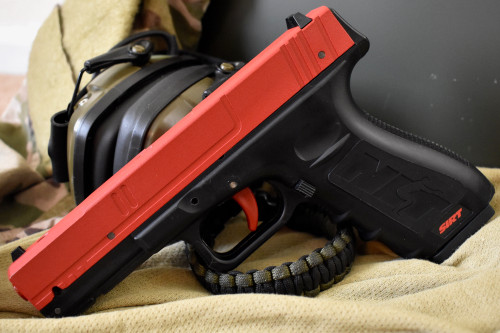
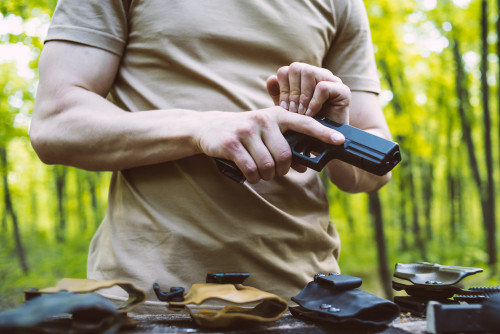
In case you’re worried about dry firing your precious pistol, let it be known that dry fire is 100% safe and effective.It won’t hurt your gun, but you can load snap caps or dummy rounds if you’re really that worried about it. Either way, what use is a perfect gun if you never train with it? That’s like owning an exercise machine and not using it for fear of breaking it. The tool is only valuable if it is used.

Here are some tips to get started dry fire training:

24. Try the coin drill: With your gun clear and safe, place a coin on top of the slide. Practice aligning the sights and pulling the trigger without disturbing the coin. If you’re yanking the trigger, the coin will slide off. If the coin stays in place, you’re doing it right.

25. Practice additional drills: Dry fire also allows you to develop other key tactical skills, such as drawing from concealment, changing magazines, clearing jams, resetting magazines, and more. All this can be done for free, at home, any time — no range necessary.

26. Technological enhancement: Dry fire training can also be enhanced with a variety of technological solutions that make your training more effective, efficient, and fun. These tools take us one step closer to live fire at a fraction of the cost of real ammo.

Final Word

Learning the fundamentals of handgun marksmanship isn’t just for beginners. It’s a practice every responsible shooter should brush up on to remain proficient with their weapon of choice. Once you know the basics, it’s time to start putting in the reps to develop the skills you’ll need to survive a real-world encounter with an assailant.

For more training on gun safety and basic shooting techniques, Pro Armory has your back. Check out our online training courses taught by veteran instructors with real-world shooting experience. Our courses use dry fire training systems to be as hands-on as possible. Reality isn’t going to wait for you to be ready, so it’s better to train sooner rather than later.

Learn to shoot your firearm more effectively — right in your own home! Sign up for Pro Armory’s newsletter to be notified when training officially launches.

Supporting Veterans

Supporting Veterans

Veteran Operated

Veteran Operated

Speedy Shipping

Speedy Shipping

Security

Security is Our Priority

Table Of Contents

    26 Handgun Shooting Tips for Accuracy and Competence

    26 Handgun Shooting Tips for Accuracy and Competence

    June 27, 2023

    As a beginner handgun shooter, it’s easy to get overwhelmed by all the important (and sometimes contradictory) information floating around. The fact is, all you have to do is line up the sights, then squeeze the trigger without disturbing the gun. Handgun marksmanship seems simple, right?

    It may be simple in theory, but it still takes a lot of practice. You can learn the basics in a day, then spend a lifetime mastering this skill. The goal is not only knowing how to shoot a handgun but also to have good marksmanship ingrained so deeply in your muscle memory that you perform well automatically — even under extreme stress.

    Achieving this goal begins with the basics. Let’s break the seven fundamentals of handgun shooting down into 26 actionable tips, so you can get to work building the skills you need to make yourself and everyone around you safer.

    Tips for Handgun Marksmanship

    The fundamentals of marksmanship are the same whether you’re firing a single-shot derringer or a .50 caliber sniper rifle. But while a rifle tends to be more accurate due to its size and length (making it easier to control), the main challenge of handgun shooting is the weapon’s small size and comparative instability. Your arms, legs, torso, and grip have to create a platform to make up for this lack of stability. Otherwise, the fundamentals of shooting remain the same.

    For simplicity, we’re going to avoid dealing with tactical application (e.g., draw stroke) and just focus on hitting what you’re aiming at. We have to crawl before we can walk, so we’ll save tactical application for another article.

    Here’s a collection of our best tips for shooting handguns, divided by the fundamental disciplines of handgun shooting.

    Safety

    Before we begin, let’s cover safety. Heard this before? Good. Hopefully, you hear it every single time you go to the range and think about it every time you look at a gun. Never forget these are deadly weapons. The moment you become complacent and lose respect for the gun, you’ll make a mistake you can’t undo.

    1. Treat all guns as if they are loaded. Know the status of the gun at all times. Even if you know the gun is not loaded, you should still treat it as if it is. The goal is to build unconscious safety habits.
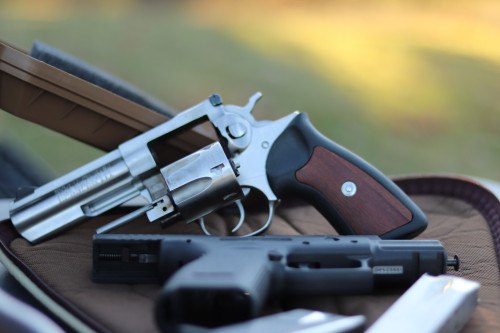
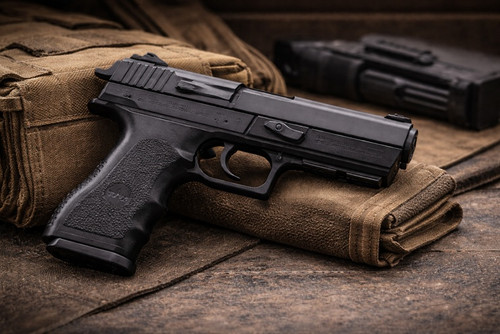
    2. Always keep the barrel pointed in a safe direction. In other words, never point the gun at something you don’t want to destroy. Forget what you know and allow the unconscious habit to develop.

    3. Always be sure of your target and beyond. It’s not enough to be situationally aware of the gun. You have to know where you’re shooting, what you’re shooting at, and what’s beyond it. Already checked it last time? Check it again.

    4. Keep your finger off the trigger until you’re ready to shoot. Remember, the gun can’t go off on its own. Stories of people tripping and shooting a friend or accidentally shooting themselves in the leg while holstering are not freak accidents. This happens when you have your finger on the trigger when you shouldn’t. Don’t be that person.

    Breathing

    Remember to breathe. This might seem ridiculous, but under extreme (or even moderate) stress, people tend to hold their breath. Combined with the effects of adrenaline, it can be extremely exhausting. This is part of the reason why combat sports are so taxing — many athletes are holding their breath!

    5. Take deep breaths: When shooting a handgun, it’s important to breathe properly so you can think clearly and shoot accurately. Just before you shoot, take an exaggerated deep breath to make sure you’re consciously breathing. It might feel absurd, but it works. Make it a habit.

    6. Remember, you’re not a sniper: You’re not trying to make a mile-long shot where a single breath can affect sight alignment. More often, you’re training for a gunfight at seven yards. In that situation, you can’t pass out, get tunnel vision, or otherwise allow the effects of adrenaline to wreak havoc on your body. Breathing is the best way to mitigate these effects.

    Stance

    When beginners are taught to shoot, they’re usually presented with several stance options bearing names like Weaver, Isosceles, Chapman, etc. While these are useful frameworks for developing your own shooting stance, there is a more fundamental way to look at this:

    7. Just stand up: The simplest way to find a good stance for shooting is to stand braced like someone is going to toss you something. Don’t overcomplicate it. In time, you’ll refine your stance to suit your needs.

    8. Stay balanced: Remember, this is a fighting position. Don’t lean too far back or too far forward or otherwise do anything that feels strange. A balanced stance is the right place to begin, then you can adjust over time.

    Grip

    When the gun fires, it will recoil. To maintain accuracy, you need a solid grip to manage that recoil and put you in an optimal position for follow-on shots.

    9. Grip high: With your shooting hand, grip the gun as close to the slide as possible. There is a groove there for this purpose. Remember, all the movement is at the top of the gun as the slide cycles. If your grip is too low and/or too loose, the gun will flop around, making it much more difficult to realign your sights for a follow-on shot.

    10. Use your support hand: Your support hand, tilted at 45 degrees, will fill in all the empty space that may otherwise allow the gun to recoil harshly. Your thumbs will align along the slide, stacked on top of each other.

    11. Try a clamshell grip: Clamp your hands together like a clamshell, tight enough to limit recoil, but not so tight your forearm muscles start cramping or shaking. You’re trying to hold the gun as tightly as you can, but you’re not trying to smash it.

    12. Keep your finger off the trigger: Your index finger should rest straight along the side of the gun, outside the trigger guard. Once you start doing this regularly, you’ll notice movie and TV characters cluelessly running around with their fingers on the triggers. Don’t be like them.

    13. Forearm alignment: You want to be sure the gun aligns with your forearm on your shooting hand. The force of the gun is coming straight backward, so you want it to be absorbed by a straight arm. Don’t pivot the gun in one direction or another.

    Sight Picture

    Your body position and grip are set. Now, you need to aim. Along the top of the gun, you’ll find the sights. The rear sight is like a “U,” and the front sight is like an “I.”

    14. Align the sights: The goal is to put the “I” in the center of the “U,” then make sure they align across the top. If all goes well, your shot will hit at the top of the “I.”

    15. Front sight focus: When aiming, you must focus on the front sight. This might seem counterintuitive at first, but this is how it’s done. This means the target and the rear sight will be blurry in your vision. Only the front “I” will be in focus.

    16. Shoot with both eyes: At first, you can aim with one eye closed, but eventually you may develop the ability to shoot with both eyes open. This is important for tactical applications. Fighting with one eye closed is not a good idea. That said, eye dominance can make this somewhat difficult, so don’t be discouraged if you aren’t able to do it right away.

    Trigger Control

    You have a good sight picture, and you’re ready to fire. If we could magically will the bullet out of the gun, we’d have a bullseye. Unfortunately, it’s not that simple. Instead, we have to activate the trigger without disturbing the sights, which is where most beginners go wrong. Here are some tips to mitigate that mistake:

    17. Find your finger position: How, exactly, the finger rests on the trigger depends on biology to some extent. Some people say to use the first finger bone, others the second. Too much finger, and your shots will pull to the right. Too little, and your shots will push to the left. Find the finger position that puts your shots in the middle.

    18. Squeeze the trigger: We say “pull” the trigger, but it really needs to be a squeeze straight backward. A slight yank in either direction could throw off your sight alignment. Your shot groupings can usually indicate if you are yanking the trigger one way or the other.

    19. Mind the slack: The gun doesn’t fire instantly when you touch the trigger. Instead, triggers always have some slack that must first be taken up before the hammer activates. You’ll feel it as a resting point where any additional pressure will fire the gun.

    20. Don’t anticipate your shots: As you’re squeezing the trigger, your shot should come as a surprise. Any anticipation could throw off your sight alignment. It’s common to do everything right up until this point, then throw off your shot with a tiny flinch a millisecond before the hammer drops. Let your shots surprise you.

    Follow-Through

    The engagement doesn’t end after your first shot. While this might not technically be marksmanship, it’s important for developing the basis of tactical proficiency.

    21. Check results through your sights: Your instinct will be to lower the gun and see if you hit the target. This is a bad habit. What if you missed, and that goblin is still coming at you? You must learn to realign and check your work through your sights so you’re ready for follow-on shots.

    22. Reset the trigger: After your shot, don’t completely remove your finger from the trigger. This will increase the amount of time needed for follow-on shots. Instead, just release the trigger until it resets at the resting point. You’re now in an optimal position to shoot again if necessary.

    23. Remove your finger from the trigger: When you are done shooting, remove your finger from the trigger and return it to the index position along the side of the gun. Return the gun to a ready position.

    Practice With Dry Fire

    Almost everything described above can be practiced without firing live ammo. This is critical to log the thousands of reps required to make these actions habitual and commit them to muscle memory. If you don’t have the time or resources to develop these habits explicitly through range time, dry fire training is the next best option.

    The act of carrying a gun doesn’t mean you’re armed. Being armed means being competent and proficient with your gun. As gun owners, it is our responsibility to meet (and ideally exceed) this standard.

    Remember, you’re only as good as your training. Under the extreme stress of a fight for your life, you will not be able to think about these details. You will not rise to the occasion — you will default to the level of your training. If you haven’t trained, you’ll likely crumble under the pressure, failing to defend yourself and others.

    Dry Fire Training Tips

    In case you’re worried about dry firing your precious pistol, let it be known that dry fire is 100% safe and effective.It won’t hurt your gun, but you can load snap caps or dummy rounds if you’re really that worried about it. Either way, what use is a perfect gun if you never train with it? That’s like owning an exercise machine and not using it for fear of breaking it. The tool is only valuable if it is used.

    Here are some tips to get started dry fire training:

    24. Try the coin drill: With your gun clear and safe, place a coin on top of the slide. Practice aligning the sights and pulling the trigger without disturbing the coin. If you’re yanking the trigger, the coin will slide off. If the coin stays in place, you’re doing it right.

    25. Practice additional drills: Dry fire also allows you to develop other key tactical skills, such as drawing from concealment, changing magazines, clearing jams, resetting magazines, and more. All this can be done for free, at home, any time — no range necessary.

    26. Technological enhancement: Dry fire training can also be enhanced with a variety of technological solutions that make your training more effective, efficient, and fun. These tools take us one step closer to live fire at a fraction of the cost of real ammo.

    Final Word

    Learning the fundamentals of handgun marksmanship isn’t just for beginners. It’s a practice every responsible shooter should brush up on to remain proficient with their weapon of choice. Once you know the basics, it’s time to start putting in the reps to develop the skills you’ll need to survive a real-world encounter with an assailant.

    For more training on gun safety and basic shooting techniques, Pro Armory has your back. Check out our online training courses taught by veteran instructors with real-world shooting experience. Our courses use dry fire training systems to be as hands-on as possible. Reality isn’t going to wait for you to be ready, so it’s better to train sooner rather than later.

    Learn to shoot your firearm more effectively — right in your own home! Sign up for Pro Armory’s newsletter to be notified when training officially launches.