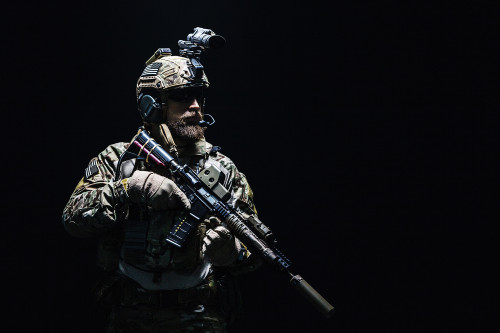
Your weapon is squared away with the latest multi-functional optic and laser aiming device. Your body armor and chest rack would make a Delta operator proud. But when that sudden gust of wind hits during your parachute landing fall and things go sideways — you don’t want your brain playing pong with your skull.
All the preparation in the world will go to waste if your head isn’t covered right. As every soldier knows you need a good tactical helmet to protect your most valuable weapon: your brain.
In many military, law enforcement, and search and rescue operations, a properly prepared tactical helmet stands between mission success and failure. It’s also an essential piece of gear for a SHTF scenario. But how should you set up a tactical helmet? What gear is most important and how can you make it comfortable? It’s certainly possible to load yourself up with too much gear.
This guide will help you pick the right type of tactical helmet, identify the right accessories that support your goals, and understand how to put it all together for ultimate protection.
Choosing the Right Tactical Helmet
Before diving into tac helmet options, think about what you need from your helmet.
Do you need protection for kinetic effects? What type of projectiles (pistol/rifle/sharpnel) do you expect to encounter? How often will you be exposed? How long will you have to wear it?
Your answers will establish the baseline requirements and help you make an informed choice.
There are essentially three basic types of tactical helmets on the market today:
- Ballistic Helmets
- Bump Helmets
- High-Cut Helmets
TIP: Before you start your helmet search, ensure you have an accurate measurement of your head’s circumference, length, and width. While not as important for bump helmets, many of which are one size fits all, ballistic helmets must be sized appropriately.
1. Ballistic Helmets: When Someone Might Shoot Back
After wearing soft head coverings for hundreds of years, we finally understood we should protect our noggins against flying objects (like bullets). Enter the ballistic helmet. Seen for the first time at scale during WWI and through the Vietnam era, early ballistic helmets were thin steel pots only suitable for protection against shrapnel and flying debris.
In the mid-80s the introduction of Kevlar led to the first helmets rated to stop small arms, first from smaller and lower velocity rounds to modern models capable of protecting against rifle rounds.
Today, ballistic helmets are increasingly used by law enforcement — and for good reason. The growing threat of well-armed criminals has led to a corresponding growth of tactical teams across the country. But everyday patrol officers are often still the first to encounter gunfire.
Most likely, preppers and survivalists will be vastly outnumbered in any societal breakdown scenario. Years of preparation will go for naught if you are unable to defend yourself and your family. Remember, there are 400 million guns out there, but it only takes one bullet to the cranium to tank your entire survival plan. A ballistic helmet can offer just the right amount of protection.
For basic protection against handguns, check out the Protector Helmet from ProArmory. Based on the U.S. Army’s classic ballistic helmet design, this no-frills option is a great choice for a range of scenarios.
2. Bump Helmets: When the Enemy Is an Inanimate Object
While low-speed grunts were forced by their leaders to wear the heavy and unattractive ballistic helmets, early-generation elite Special Operations Forces (SOF) went their own way and adopted bump helmets.
Originally designed for sporting purposes, bump helmets are typically made from plastic or carbon fiber. They offer no protection from blasts or bullets but do prevent blunt-force head injuries and can also serve as a mount for a range of accessories.
For concussion protection only, or if ballistic helmets are out of your price range, bump helmets might be the best route. Check out Chase Tactical's Tactical Bump Helmet for a simple design, with side and front mounting brackets included and a wide range of color options.
3. High-Cut Helmets: The Child of Ballistic and Bump
Against increasingly complex threats, and with the growing use of elite SOF in high-intensity combat, the high-cut helmet (a hybrid of the two existing helmet types) is the new standard for head protection.
The lighter weight and shape allows for the use of communication headsets, making the high-cut helmet a popular design for military and law enforcement organizations. However, it loses some protection around the ears compared to traditional ballistic helmets.
For customization options, the high-cut helmet is the ideal choice. A good mid-priced option is the ArmorSource AS-200 High Cut Helmet. Available in multiple colors, this helmet comes with a standard side rail and front shroud for attaching accessories.
4 Basic Components of Tactical Helmet
Tactical helmets aren’t complex systems. There are four common components to consider before accessorizing.
- Shell: The core of the helmet. For ballistic-resistant helmets this material is typically fibrous to absorb projectiles and disperse kinetic energy.
- Padding: This material on the inside of the helmet provides a cushion against the hard shell and absorbs impacts.
- Chin Strap: This keeps the tension on your helmet so it doesn’t grow wings and fly away. Modern chin straps feature a two-point system that keeps it tight to the chin, an improvement on under-chin designs.
- Suspension: A system of webbing between the shell and your head. Without it, the energy or force from projectiles or hard impacts would pass directly into your skull and brain.
Optimizing Your Setup: Go From Simple to Super Soldier
Accessories are just as important as the helmet type. While this list is not all-inclusive of every gear option, it suggests a few essential pieces that will take your tactical helmet to the next level.
TIP: Assess and prioritize your personal goals and requirements first. There is only so much you can bolt onto your helmet before it becomes burdensome, so choose wisely.
Night Vision Devices
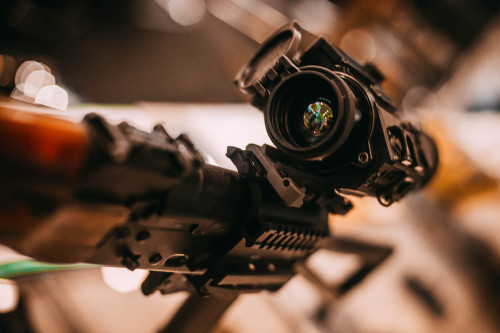
At the top of the list for utility are Night Vision Devices. Commonly referred to as NVGs (Night Vision Goggles), their introduction was revolutionary. These optics enable fighting in low light conditions and prevent you from eating shit when navigating difficult terrain at night.
Over the years, NVG technology has progressed from primitive infrared spotlighting to improved amplification of ambient light and thermal imaging. Most modern systems can now merge ambient and thermal into a single picture.
Unless you have a sugar mama (including old Uncle Sugar) or hit the Powerball, top-of-the-line binocular NVGs may not fit your budget. Instead, opt for the SiOnyx Opsin 1x19mm Night Vision Ultra Monocular, which offers similar capabilities to the U.S. Army’s PVS-14, still in use after nearly two decades of combat-tested service.
Lights
Lights can fulfill numerous roles, helping you execute personal tasks in low light, illuminate movement, and clear objectives with and without NVGs. Visible and infrared strobe lights are essential for your teammates to maintain visibility of your position. They can also be used to stun or temporarily blind enemies in the right context.
The Princeton Tec Charge Pro is a versatile light that comes with a range of visible colors and IR modes, and long battery life. It’s easily mountable on helmets, weapons, or body armor.
Helmet Covers
Most helmets you order will arrive with a shiny exterior. That’s nice if you’re just doing some flashy unboxing video. But if you’re using your helmet for combat, the extra shine can be seen by the enemy. Not good.
A helmet cover is a great solution here. They come in a variety of colors and patterns, designed to camouflage or darken that shiny dome. Helmet covers can also include features to assist in mounting gear or swag. After all, you’re not cool if you don’t have snarky patches.
You may need more than one cover depending on your operating environments. Forest, jungle, desert, urban, and winter conditions each require different colors and camouflage patterns. To complement Pro Armory’s Protector Helmet check out the Tru Spec PASGT Helmet Cover from U.S. Patriot Tactical.
Headsets/Comms
Everything is awesome when you’re a part of a team, and communicating effectively is a priority in any tactical scenario. Luckily, comms technology has come a long way from jamming a plastic radio handset through your helmet chinstrap. While they may not have the traditional field-expedient MRE spoon attachment, modern headsets offer both communication capability and hearing protection in one package.
Headsets are now commonplace across both military and law enforcement, and they come in several different styles. The simplest utilize more ruggedized versions of running earbuds with a microphone attachment. On the high end are models with heavy-duty soundproofing to prevent hearing damage, while still allowing low-volume background noise and conversation.
The Peltor series from 3M has been the gold standard in headsets for decades, and the ComTac V Single Comm Tactical Headset upholds that standard of excellence. It offers superb noise reduction with a two-way radio-capable headset.
Putting It All Together: 5 Simple Steps
After procuring your helmet and accessories, these five simple-to-follow steps will help you get that helmet just right.
1. Fitting the Straps and Padding
When it comes to fit, comfort is king. An uncomfortable tactical helmet will severely limit your ability to think clearly and maneuver in tough situations. Adjust the suspension so the helmet fits snugly on your forehead. If it leaves indentations after five minutes of wear, it will feel like your worst hangover after an hour or more. Add a little more slack. A tight chin strap allows for flexibility in the suspension.
Padding systems are modular, allowing for variations in head size and shape. Both the suspension and the padding, once adjusted, should keep the helmet perpendicular to the ground, with the brim approximately one inch above your eyebrows.
Chinstraps and webbing, usually with four attachment points, secure the helmet to your head. With the chinstrap buckled your helmet should not budge when moving your head around. Ensure it is centered on the chin to maintain levelness.
2. Attaching Your NVGs
NVGs can be attached in several ways, such as a bracket or shroud secured to the shell of the helmet, which serves as the receiver for the device. Many helmets now come with built-on shrouds for NVGs, but others may require one or more screws or a clamping system to secure the bracket. Wilcox and TNVC offer high-quality mounts which you can use for several types of NVGs.
Once the bracket is secured, attach your NVGs. The smart Ranger will also secure the very costly system to another point on the helmet to prevent loss if the mounting system fails or the quick release is accidentally activated. Test the helmet fit again with the NVGs in the down position. If they pull the helmet down, you can add a battery pack to the back to serve as both a counterweight and an extra power source.
The last step is calibrating your device. Read the instructions for your model and find a dark place to adjust the zoom, focus, and gain. Remember these will change based on operating environments (outside vs inside, the amount of ambient light, etc.).
3. Setting Up Comms
Unless you’re going full Leeroy Jenkins, you’re likely part of a team. But comms are important for staying connected to the outside world in any situation. In a SHTF scenario, you want every opportunity to pick up and respond to a radio signal.
To rock a headset, ensure it fits with your helmet type. A lower profile is necessary for most ballistic helmets and some padding may have to be shifted. Bump and high cuts should be fine for most models. The headset may need to be secured to the helmet, most often using modular side rails. Then route any wiring through the webbing or helmet/cover and mount any required batteries.
4. Lights, Cameras, and Other Accessories
For illumination lights, mount to either side rails or the front shroud (if no NVGs). Once attached, turn them on and adjust the alignment as necessary. For strobes, attach to the top or rear of the helmet and check visibility from various angles.
Identify any remaining items of gear you may need. This could include cameras (mountable on side rails or shroud), pouches for items requiring quick access (batteries, chem lights, etc.), and counterweights to balance the helmet if weight is unevenly distributed.
5. Action: Functions Check Your Masterpiece
Once you’ve set up all the bells and whistles, it is time to give the setup a thorough functions check to ensure everything works together. Try to do so under the conditions you expect to face. Your neighbors might give you a WTF look as you execute combat rolls and vault over walls — that’s okay. You need to replicate the stress your setup will endure to ensure it won’t fail you during a time of need. So, dodge, dip, duck, and dive to verify your fit is snug and comfortable and your gear solidly mounted and functional.
Final Thoughts on Tactical Helmets
Before you ran into this article you probably thought this guy looked like a high-speed killer.
Image courtesy of KnowYourMeme.com
You now have the blueprint for identifying all your helmet needs, from style to functional accessories. To be fair, this article won’t take you from Meal Team Six to slaying Bin Laden, but it’ll get you on the right track. To truly make the most of your tactical helmet, you need two things:
- High-quality gear and accessories
- Training to use them properly
At Pro Armory, we offer ammo, accessories, and training to help tactically-minded people like you prepare for anything. Find excellent, affordable tactical gear for your helmet, and gear up today!
Want to learn tactical maneuvers and improve your shooting skills? Pro Armory offers online training to help you become more proficient and safe with your firearm and other gear. Sign up for our newsletter today to be notified when training officially launches.


