


You’ve heard it before countless times: your weapon should act as an extension of you. From real-life operatives and competitive shooters to fictional heroes, the greatest gunslingers treat their pistols as part of their bodies. But while the idea certainly sounds cool, what does it mean? How do you achieve that unity? It all starts where the human and the gun connect: the grip.
Holding a handgun may seem like a no-brainer. You wrap your fingers around it, point the business end at your target, and pull the trigger, right? That may work at five or seven yards, but at farther (more realistic) distances, a sloppy grip can cause major issues. If you’re shooting low left, constantly having malfunctions, or unable to create a good grouping, you probably have a grip problem.
Improper grip can take many forms, but in general there are only a few ways to grip a gun properly. Learning to hold a handgun properly might feel strange at first. But over time, you’ll find that proper grip technique is more comfortable and maneuverable for all handguns.
Let’s define proper pistol grip and take a closer look at how to correct certain grip errors.
Why Is Pistol Grip Important?
If you’ve ever played a sport, you’ll intuitively understand why grip is important when shooting a pistol. You can’t throw a touchdown, score a goal, or sink a three-pointer without the right technique.
The same goes for shooting. Above all, your grip is going to affect your accuracy. With an action as precise as shooting a handgun, even small mistakes can lead to big errors. That’s why nailing down the correct grip is paramount for any aspiring shooter.
It’s not the only reason, though. Proper grip can also help recoil management. This, in turn, will help you with fast, accurate follow-up shots. Regardless of whether you’re using a pistol to compete or defend yourself, recoil control is an important skill to build.
Finally, improper pistol grip can be a legitimate firearm safety concern for beginners. If you’re not holding your gun correctly, it can cause jams (known as “limp wristing”). If you’re really messing up your grip, the recoil may cause you to drop your gun entirely — and that’s a big no-no.
Foundations of a Good Handgun Grip
Just like any skill, good handgun grip starts with good fundamentals. It comes down to three main factors.
- Grip Pressure: Hold the gun tightly with your dominant hand, but not so tightly that it starts shaking. Your support hand should have a tighter grip than your dominant one. Many new gun owners either squeeze too tightly or too loosely around the grip.
- Hand Position: Wrap the bottom three fingers of your dominant hand around the pistol grip. Weave the fingers of your support hand between the knuckles (not interlacing your fingers).
- Finger Placement: Wrap your non-dominant index finger around the outside of your dominant hand. Keep your trigger finger (dominant hand index finger) outside of the trigger guard — on the frame above the trigger guard — until you’re ready to fire. This will help prevent negligent discharge.
The Two-Handed Grip Technique
Today, we take for granted you need two hands to hold a pistol properly. But this wasn’t always what people believed.
Origins of the Two-Handed Grip
If you look at pictures of Army instructional manuals dating from the First World War through Vietnam, you’ll notice something. For decades, the “accepted” way to shoot involved a single hand.
The idea was that humans are inherently good at pointing at things with their fingers, and shooting should be an extension of that natural motion. The technique came to be known as “point shooting.” For a while, that was good enough.
That all changed thanks to an LA County Sheriff named Jack Weaver. During the 1950s, Weaver participated in pistol shooting matches in Southern California organized by legendary pistolero Jeff Cooper. Weaver noticed that other competitors would quickly draw and fire their guns, but often miss 18-inch balloons at seven yards.
As a result, Weaver began bringing his pistol up to eye level and using two hands to aim it. His theory was that “a pretty quick hit is better than a lightning-fast miss.” Weaver started dominating competitions, and the two-handed technique quickly replaced one-handed point shooting. As an homage to the gunslinger, the technique became known as the “Weaver Stance.”
Revolver vs Semi-Auto Grip
Often, you’ll see someone in a movie or TV show holding a revolver with one hand wrapped around the grip and the support hand wrapped around the pinky finger and knuckle. This is known as a “teacup” or “cup and saucer” grip, since it looks like a polite British person is about to ask if you need a biscuit.
This type of grip arises from fear. When a revolver fires, some of the expanding gas escapes from where the cylinder meets the barrel. Like Taco Bell farts, this expanding gas is extremely powerful and can cause serious damage to anything that’s too close to the cylinder gap.
The teacup grip attempts to protect your fingers by keeping them away from the cylinder gap. However, it’s seriously overkill. The hand that rests underneath the gun with this grip style does absolutely nothing. If you’re exercising a proper clamshell grip, you can hold revolvers and semi-automatic pistols the exact same way and manage recoil perfectly.
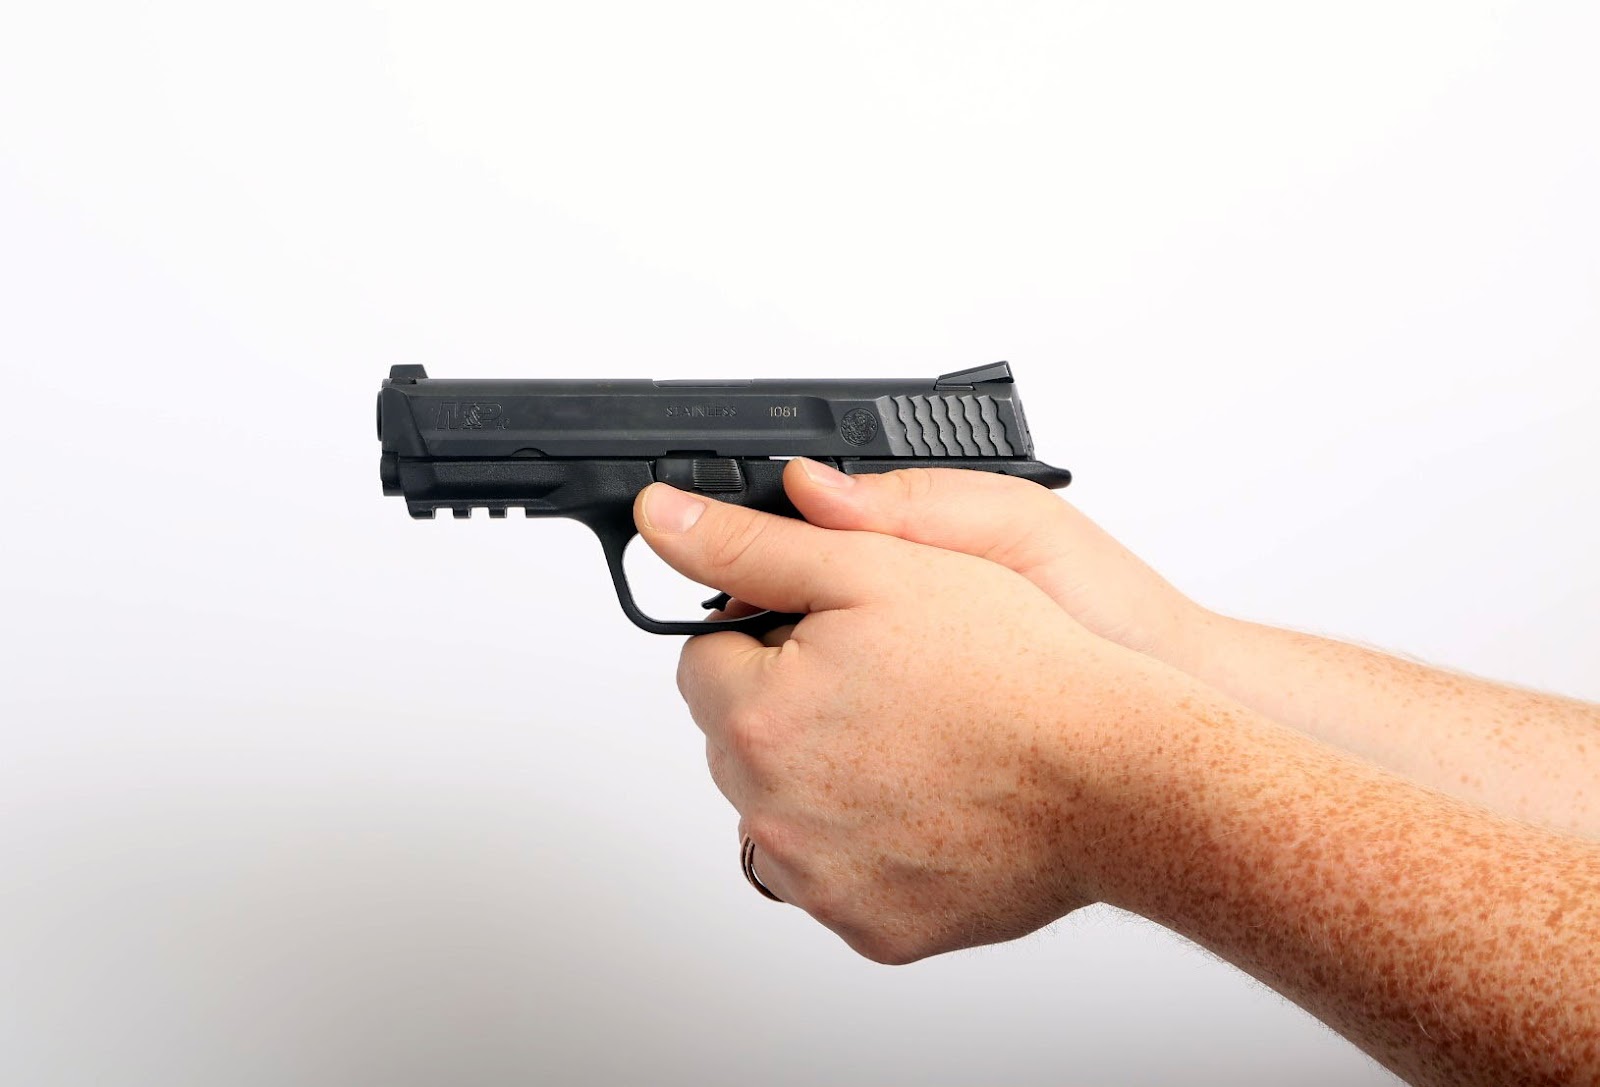
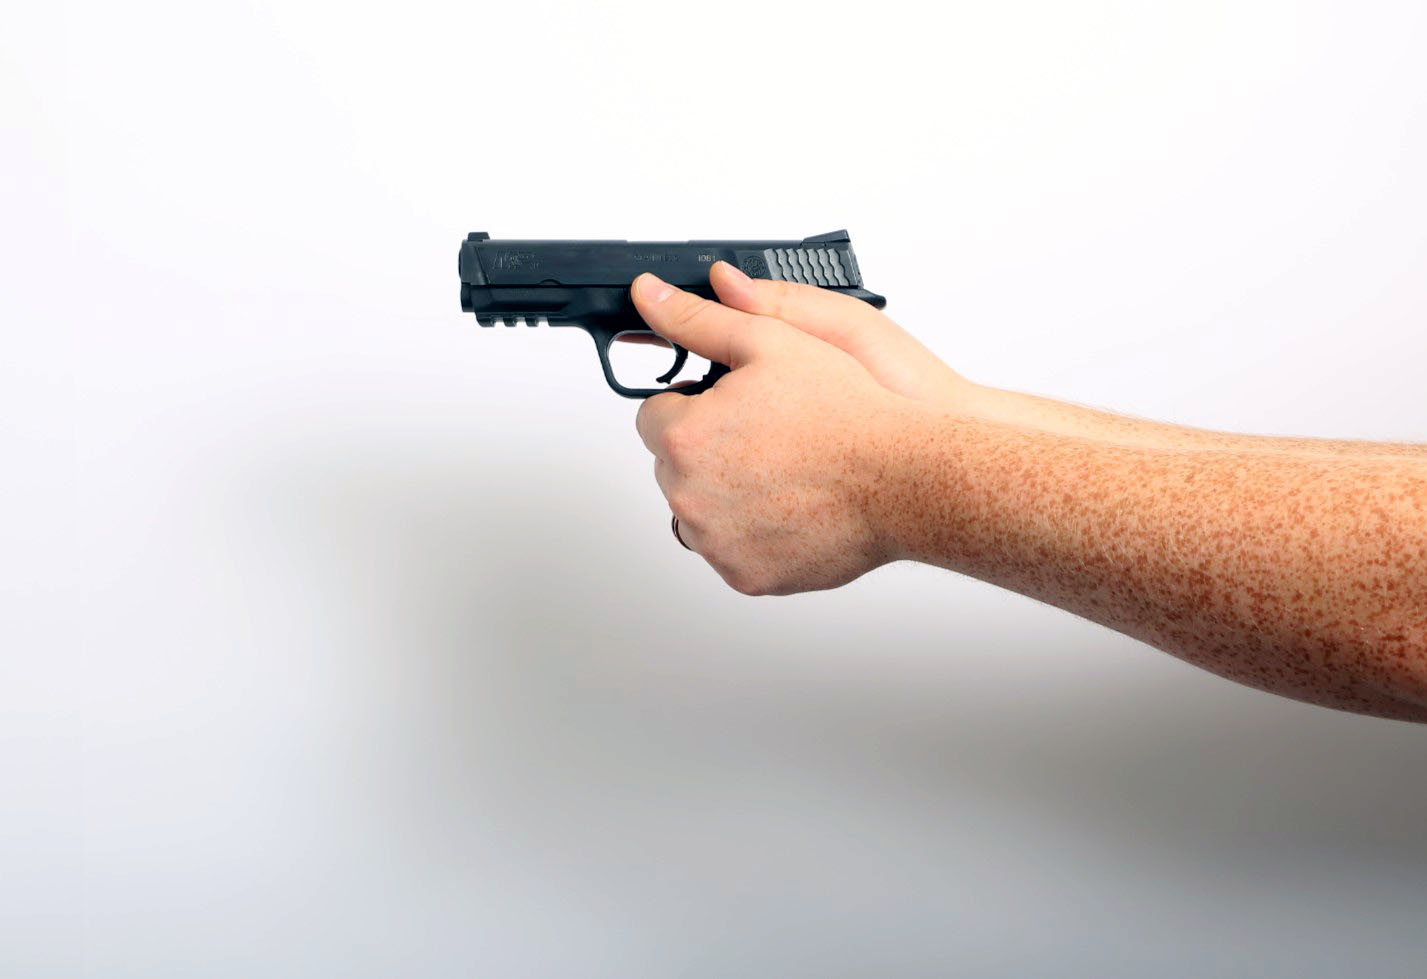
Complete clamshell grip
The Clamshell Grip and Isosceles Stance
The “Weaver Stance,” while popular back in the day, has become even more refined in recent decades. Now, pistol shooters work on a new grip and stance in conjunction for maximum accuracy.
Today, the Clamshell Grip is the standard (and most effective) grip method. They call this method a clamshell because your hands automatically tighten down like a clamshell around the gun as you push it forward (more on that later). This two-hand grip gives your hands the most real estate to occupy. This, in turn, gives you the most stable grip possible and maximum control over the gun.
Dominant Hand
Begin by resting the firearm in the “c” shape of skin webbing between your thumb and index finger on your dominant (trigger-pulling) hand. Your thumb knuckle should be on the opposite side of the gun from your trigger finger. Don’t rest the corner of the gun inside your thumb knuckle — if you do, you’re holding it wrong. This can feel weird at first, but eventually it’ll give you maximum grip comfort.
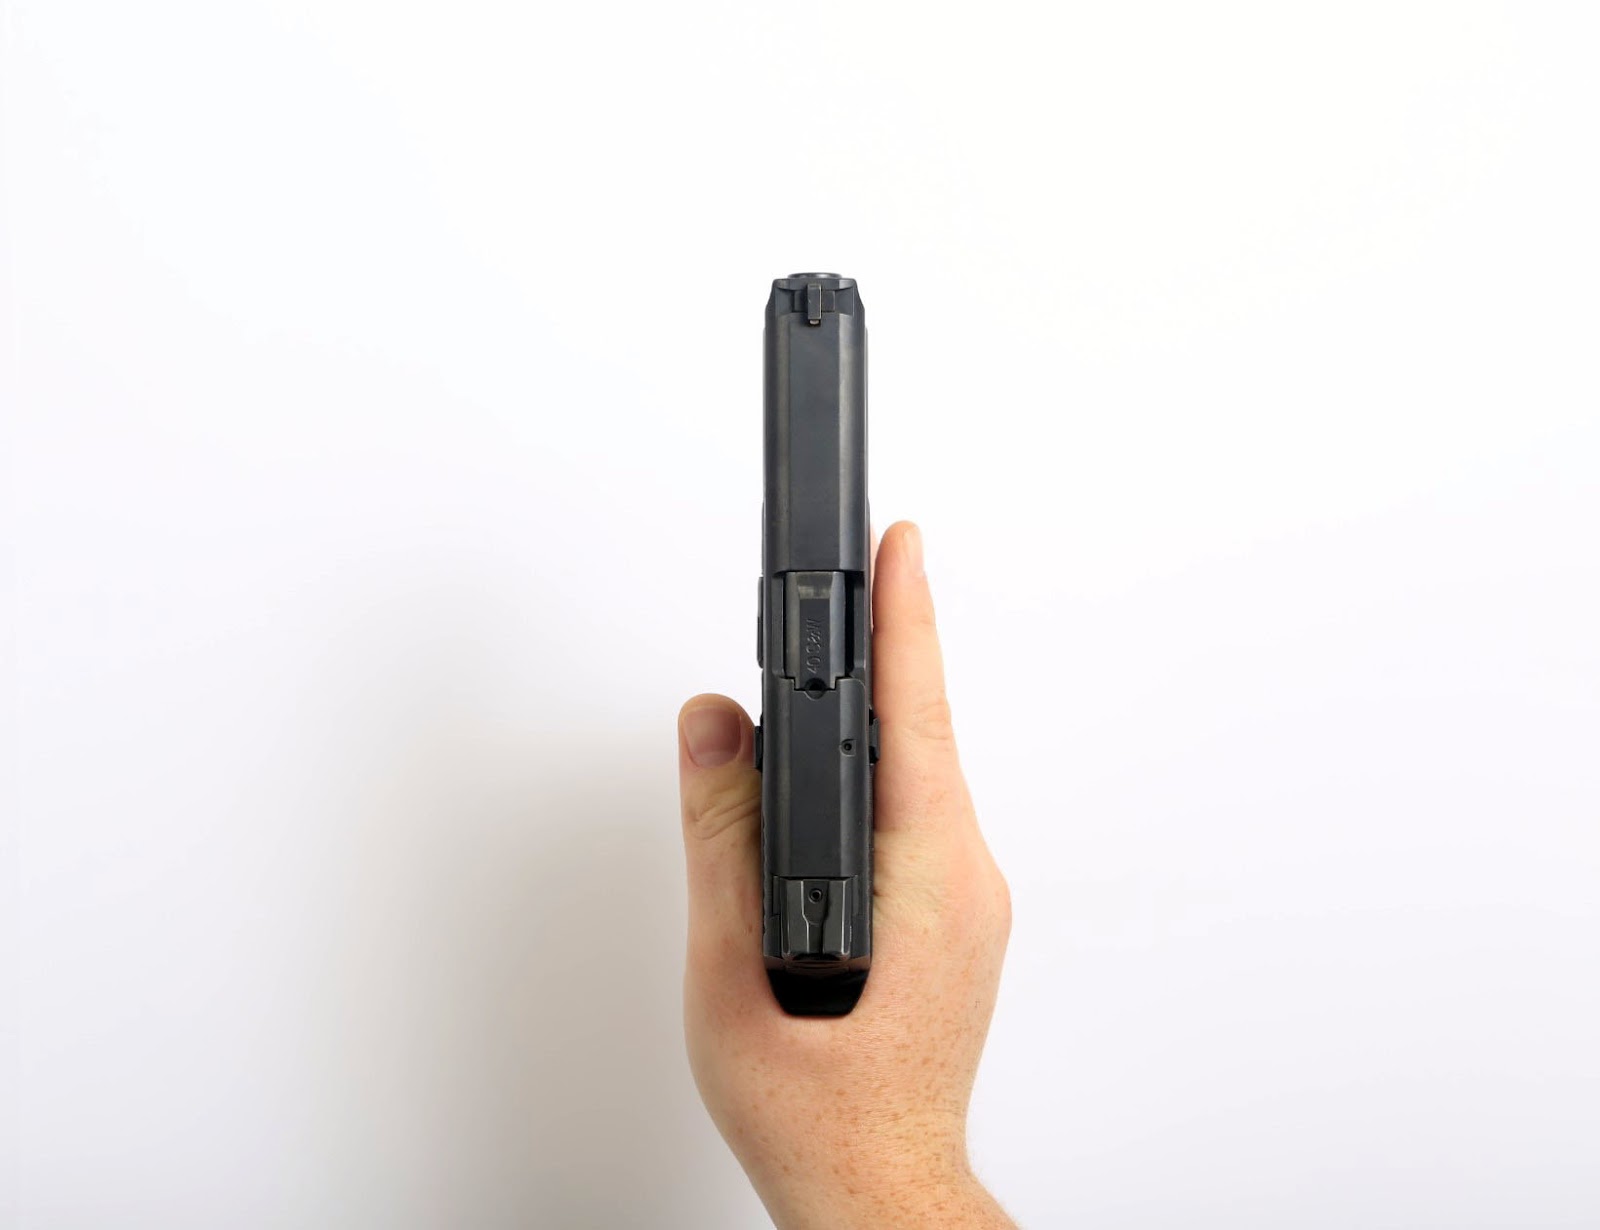
Top View
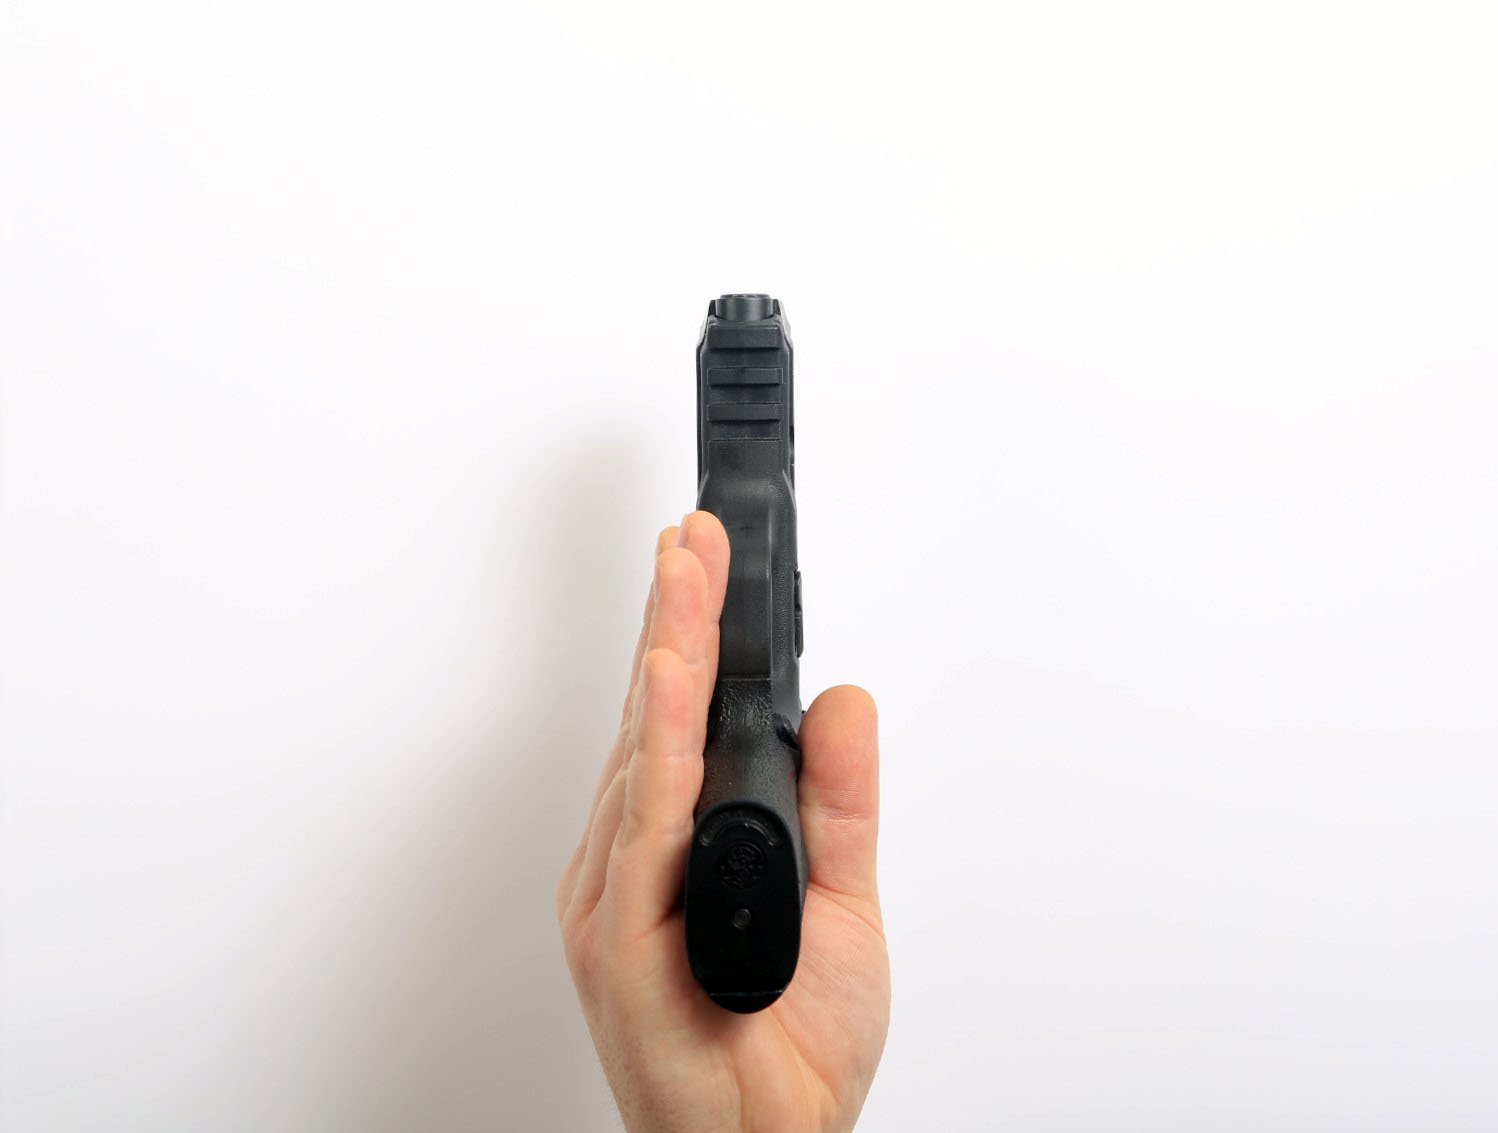
Bottom View
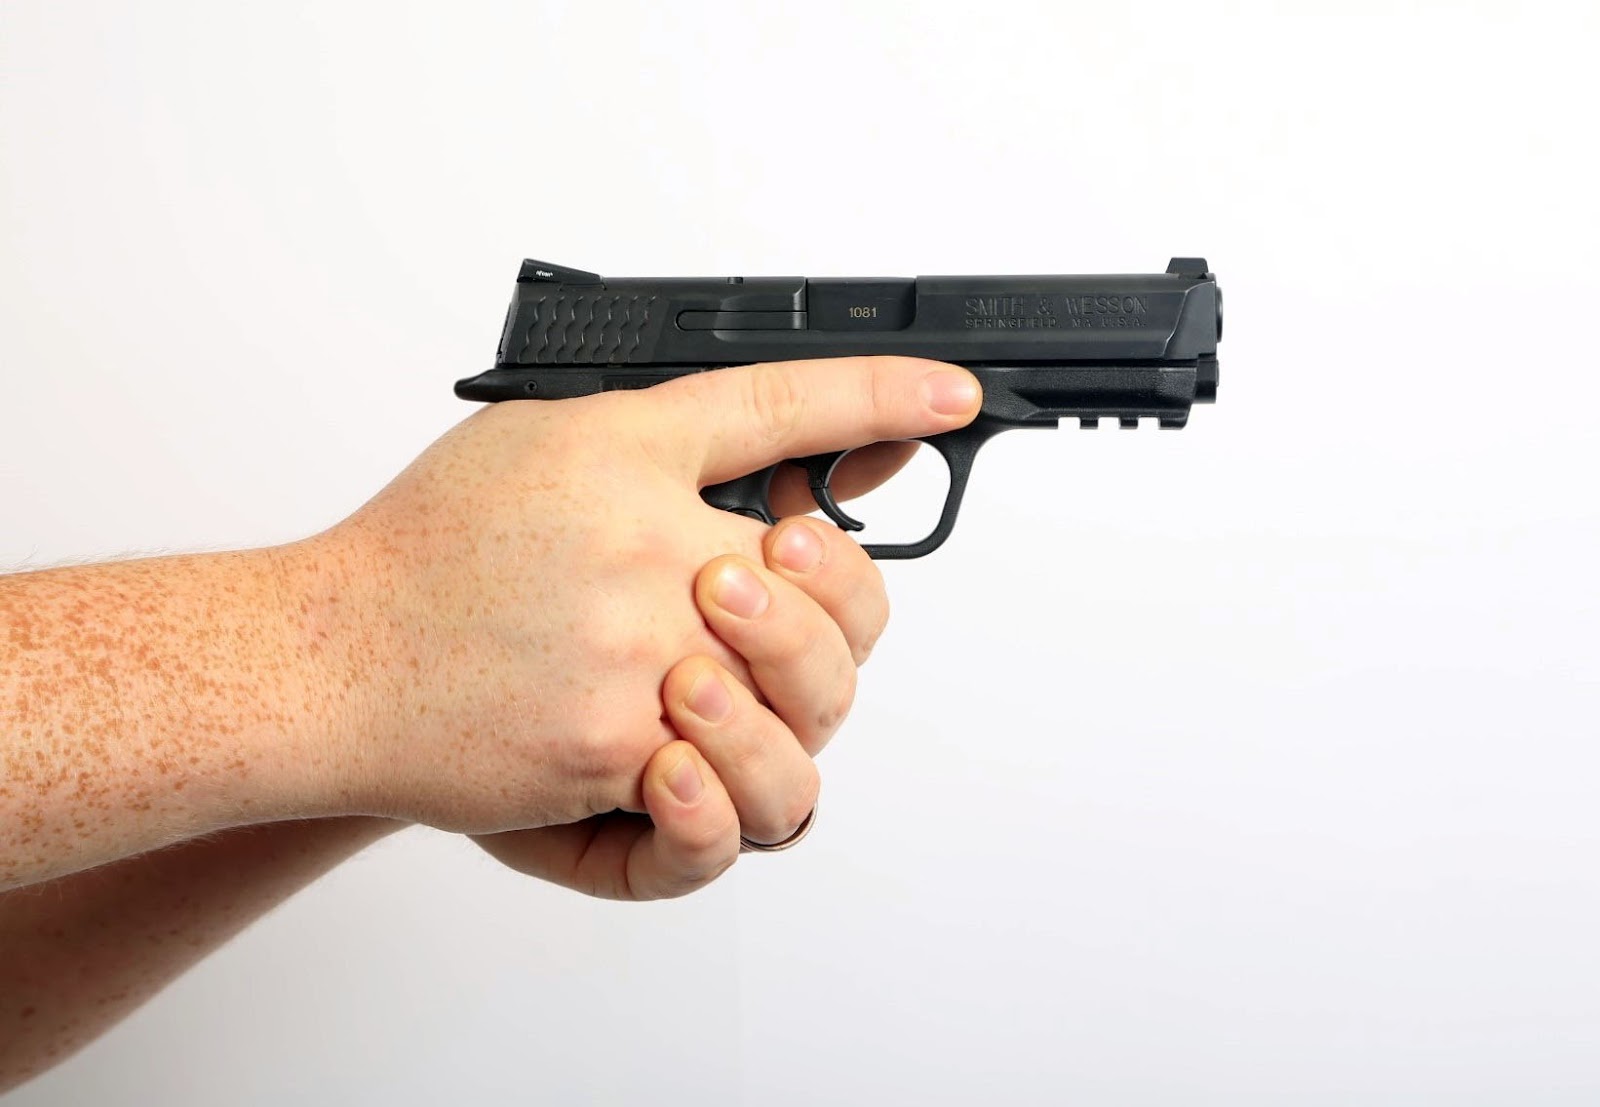
Now, wrap your bottom three fingers under the trigger guard. Again, keep your trigger finger on the frame above the trigger guard until you’re ready to fire.
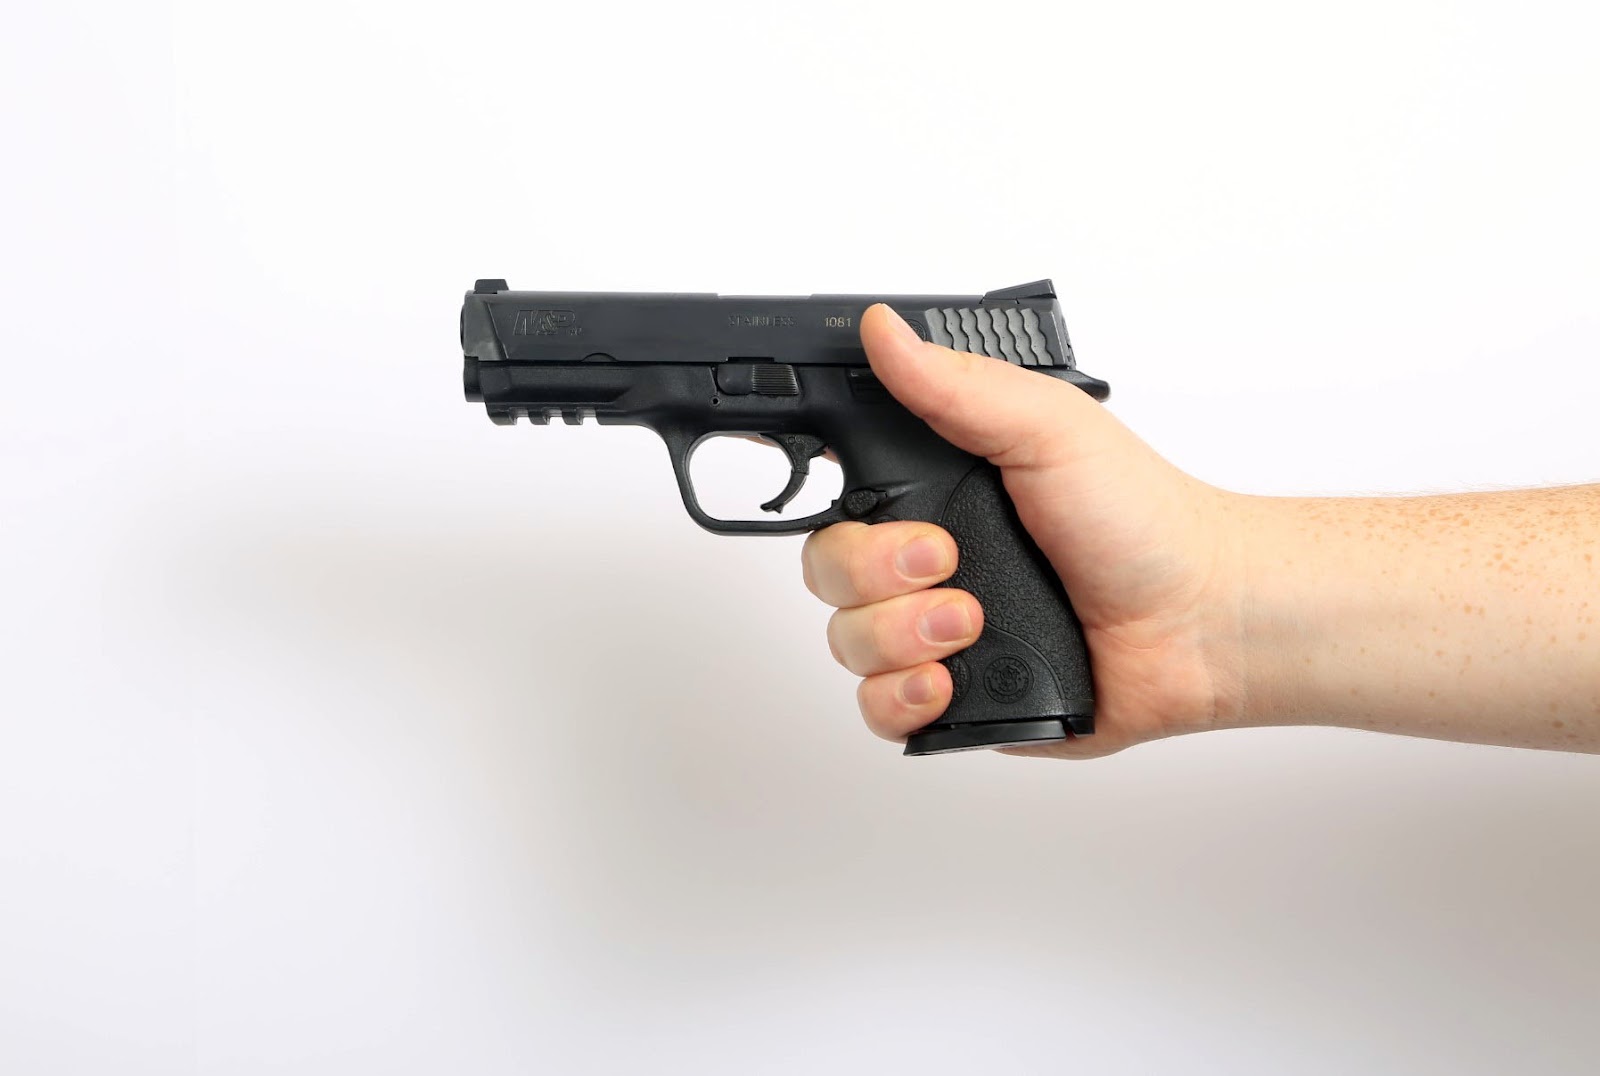
Wrap three fingers under the trigger guard.
Support Hand
Next up, your support hand. Reach out like you’re going to shake someone’s hand. Your thumb should be at a 45-degree angle to the rest of your hand, pointing straight ahead. The thumb of your support hand and your trigger finger should be parallel.

Support hand at 45 degree angle
Weave the fingers of your support hand between the knuckles (not interlacing your fingers). The trigger guard should rest between the first two knuckles of the index finger of your support hand. If it is, you have a perfect grip. Many modern guns have texture points to show you where skin touches grip.
Complete clamshell grip
When you achieve the proper clamshell grip, the heels of both hands should rub against each other.

Close up view
Clamshell grip (other side)
Why the Clamshell Grip Is The Best Method
As we mentioned before, your body naturally knows where it is in space. If you point across the room at a picture, you’ll be able to point in its general vicinity without even looking at it. If you can get a good grip, your gun will be an extension of your body and do this naturally.
Additionally, the correct grip will keep your hands out of the way of the slide recoil. Proper grip will also prevent you from releasing the gun’s magazine accidentally.
Modified Isosceles Stance
While proper stance could warrant an entire article of its own, here’s the abridged version: you need a stance that compliments the clamshell grip and gives you enough stability to handle your firearm. The modified isosceles stance is perhaps the best fit. It uses your natural muscular structure to tighten your grip on the gun without having to use energy tensing your muscles.
Keep your weight on the balls of your feet, with your toes kissing the ground. Establish your grip close to your body, then push the firearm forward. Keep your arms raised and parallel to one another. Don’t lock your arms, or you’ll restrict blood flow and enhance recoil. The technique is the same for righties and lefties, just a mirror image of one another.
Common Grip Mistakes and How to Avoid Them
If you’re practicing the wrong grip, you’re going to develop bad habits. Try to avoid some of these common grip errors in your training:
- Index Finger on Trigger Guard: With the clamshell grip, a beginner might be tempted to put the index finger of their non-dominant hand on the trigger guard. This is a common mistake among newbies, mainly because it kind of looks cool. However, it will often make you tense up and pull your shots.
- Wrong Thumb: Putting the wrong thumb on top of your grip is another common problem. This tends to manifest in two different ways. Sometimes, new shooters try to weave their primary thumb underneath the support-side thumb, but this will be noticeably uncomfortable and will likely loosen your grip. Other times, you may put one thumb on either side of the firearm, which is also incorrect. Both thumbs should be stacked on top of one another on the support side of the firearm (with the support thumb beneath the primary thumb).
- Weak Grip: Some beginners struggle with the right amount of grip (tightness). As a general rule, your dominant hand’s grip should be firm but not strangling. A semi-relaxed dominant hand will help you shoot faster. Instead, your non-dominant (support) hand should be firmer, doing most of the squeezing. If your support hand is too weak, you’ll shoot low left (for a righty).
How Gear Can Enhance Your Grip
While grip is largely a matter of technique, some gear can really help you improve grip.
Choosing the Right Pistol
By far the most important piece of gear to enhance your grip is your pistol itself. As a wise man once said, “you don’t change your grip for your pistol, you change your pistol for your grip.”
Find a gun that feels good in your hands. To start, rest your trigger finger on the trigger. If you have to adjust your hand to pull the trigger, the grip is too big for you. Conversely, if you have good grip and reach for the trigger but notice your entire finger engulfing it, the grip is too small. With the ideal grip, the trigger will fall right between the joint or the center portion of your index finger’s tip.
So, which guns should you look for? Most people go straight for the Glock, but most of these models aren’t designed with grip in mind. While they may be some of the most popular handguns in the world, Glock ergonomics aren’t great for all hand sizes. They’re more like bricks — sure they can work as weapons, but they aren’t the easiest to hold. That’s not to say you should eschew Glocks entirely. After all, they’re great pistols. Just make sure you try one and like how the grip feels before you buy it.
Conversely, several handguns are tailored to smaller hands or to otherwise provide better grip. For example, the CZ P-10 series features a grip that’s contoured for enhanced ergonomics in smaller hands. The Walther PDP F Frame is another great pistol for small hands, and was actually designed for women (although 75% of the guys who try it love it, too).
Other Gear
Outside of pistols, a few other pieces of gear can enhance your grip.
- Shooting Gloves: Take a look at the other shooters around you at your next range trip. Chances are, none of them are wearing gloves. But shooting gloves can actually be a great tool, both for mitigating recoil and helping ensure a tight grip on your pistol.
- Custom/Textured Grips: Some grips are customizable to fit your hand better. One option here is called “stippling,” where you melt small tiny dots into a pistol’s grip to improve your hand placement. The one thing we would mention is to not try stippling your own grip — it’s gonna turn out ugly and dysfunctional. Invest the money in having an actual gunsmith perform your stipple job.
- Red Dot Optics: While a red dot isn’t going to directly affect how you hold a gun, it will help you develop a proper grip by making follow-up shots easier.
Frequently Asked Questions (FAQs)
Why Do My Shots Keep Veering to the Left (or Right)?
If you notice your shots are hitting to the left (or right if you’re left-handed), you may be looking at a few issues. One of the most common is recoil anticipation. You can fix this by training with snap caps (polymer rounds with no gunpowder), which can simulate malfunctions.
You could have a problem with your grip formation, too. For example, you may not be positioning your trigger finger correctly. Remember, you should use the part of your finger between your knuckle and the pad of your index finger to press through the trigger.
Finally, your grip may be too tight. Squeezing too tightly with your dominant hand can cause your shots to veer in one direction. Try letting up on your dominant hand and using your support hand instead.
How Can I Strengthen My Grip for Better Handgun Control?
Looking for a way to improve your grip strength outside of the range? Crush grip exercises are a great place to start. One easy way to improve your crush grip (ability to squeeze your fingers together tightly) is by squishing a tennis ball. Here’s how it works:
- Hold the ball in your right hand with your palm up and elbow bent in an “L” shape.
- Clench your hand together to squeeze the ball and hold for five seconds.
- Repeat 10 times, then switch hands. Repeat 10 times a day.
If you do this exercise regularly, you’ll notice incremental improvements in your grip strength.
How Often Should I Practice My Grip to Stay Proficient?
Just like any skill, shooting a pistol requires regular practice or it’ll atrophy. You have two options to practice your grip, and you should use both.
The first is dry firing, which you should do on a frequent basis. Live fire training can get expensive, considering the cost of ammo and range time. But if possible, you should try to get live fire training at least once a week. With regular practice, you’ll turn a good grip into muscle memory.
Essentially every pistol drill will help work on your grip strength. However, there’s one drill you can use to diagnose and fix grip problems quickly.
Draw a black vertical line on a piece of paper with a sharpie. Shoot at the line at five feet away. If you notice your shots pulling to one side or the other going to one direction or the other, your grip is likely off.
You can do the same drill with a horizontal line. If you’re missing up or down, you’re flinching with anticipation.
How Should I Grip a Handgun If I Can Only Use One Hand?
Some users with disabilities may have trouble achieving a proper grip with a handgun. This is particularly true if they only have use of one hand or arm, which obviously makes the complete clamshell grip impossible. In this case, shooters need to adapt to grip the gun with one hand. The same grip principles of the clamshell apply (for the dominant hand). However, instead of holding the firearm vertically (as people with two hands should), one-handed shooters should tilt the gun sideways at a 45-degree angle. This allows you to absorb more recoil without using a second hand.
Final Thoughts
Proper grip requires attention to detail. Where you place your hands in relation to your firearm, how tightly you squeeze the grip, and how your fingers move in that position all influence accuracy. Modern technique suggests the clamshell grip provides the best results.
While reading about proper shooting techniques on the internet is a great place to start, it’s sort of like reading about disease symptoms on Google. At the end of the day, you’re going to want to go to a doctor.
The same is true of pistol shooting. The best way to improve is with an instructor. A teacher can give you individualized pointers, and you’ll take more away from a half-hour lesson than you would with days of reading written instructions.
At Pro Armory, we believe training is the most important resource for any firearm owner. With our online firearms training courses, we can help you improve your grip, stance, and overall accuracy. If you’re ready to become more proficient with your firearm, start training with veterans and professional shooters — all from home. Sign up for our email newsletter to be informed when our online training courses officially launch.
Best Ammo Deals, Training, & Accessories
Subscribe to ProArmory sales and deals email.


")