


 Pro Armory Editorial Team
Building your own AR-15 puts you in control of creating a rifle that matches exactly what you need. Many shooters build their own AR-15s to save money, learn about their firearms, and craft something unique. But before you dive in, you need to know what parts and tools you'll need.
This guide breaks down every component and tool required to build your AR-15 from scratch. This comprehensive list will keep you on track and help you avoid those frustrating mid-project trips to the gun store.
Now are you ready to build something that's truly yours? Let's get started with everything you'll need.
AR-15 Parts Overview
Before diving into details, here's a quick checklist of all 16 core parts you'll need for a complete AR-15 build:
Lower Components:
- Stripped Lower Receiver
- Lower Parts Kit
- Trigger (if not using kit trigger)
- Buffer Kit
- Stock
- Pistol Grip
Upper Components:
- Stripped or Assembled Upper Receiver
- Forward Assist (if using stripped upper)
- Dust Cover (if using stripped upper)
- Barrel
- Handguard
- Gas Tube
- Gas Block
- Bolt Carrier Group
- Charging Handle
- Muzzle Device
When shopping for parts, you'll notice terms like "stripped," "assembled," and "complete." A stripped component has the bare minimum features. Assembled parts include some extras already installed. Complete parts come fully built with all components ready to go.
One great thing about the AR platform? It's flexible. You can build AR-pattern rifles in traditional 5.56/.223, and also explore variations like AR-10s (for larger calibers like .308) or AR-15s chambered in 7.62x39mm (sometimes informally called 'AR-47s'). Note: AR-10s are a different platform with incompatible parts, and 'AR-47' is not an official designation for this platform. The basic building process stays generally similar across these variations, but some parts are not interchangeable.
AR-15 Lower Receiver Parts
1. Pistol Grip
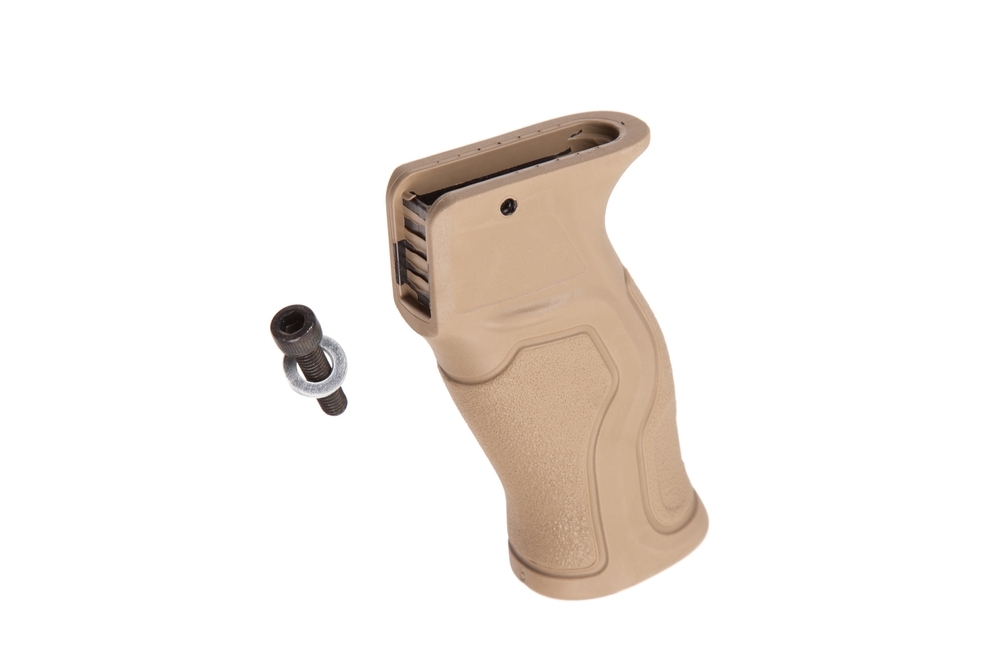
The pistol grip is where your firing hand meets the rifle. This small part has a huge impact on comfort and control.
Look for a grip that fits your hand size. Shooters with larger hands might prefer something with a wider profile, while those with smaller hands might want something slimmer. The angle of the grip also matters—some lean more forward, others more vertical.
For states with restrictive laws (hello, California), you might need a featureless grip that doesn't allow your thumb to wrap around it. Companies like Thordsen and Resurgent Arms make compliant options that maintain good control while staying legal.
The best part? Grips are easy to swap out and typically cost $15-30. Due to this reason it makes them a low-risk upgrade if you don't like your first choice.
2. Trigger
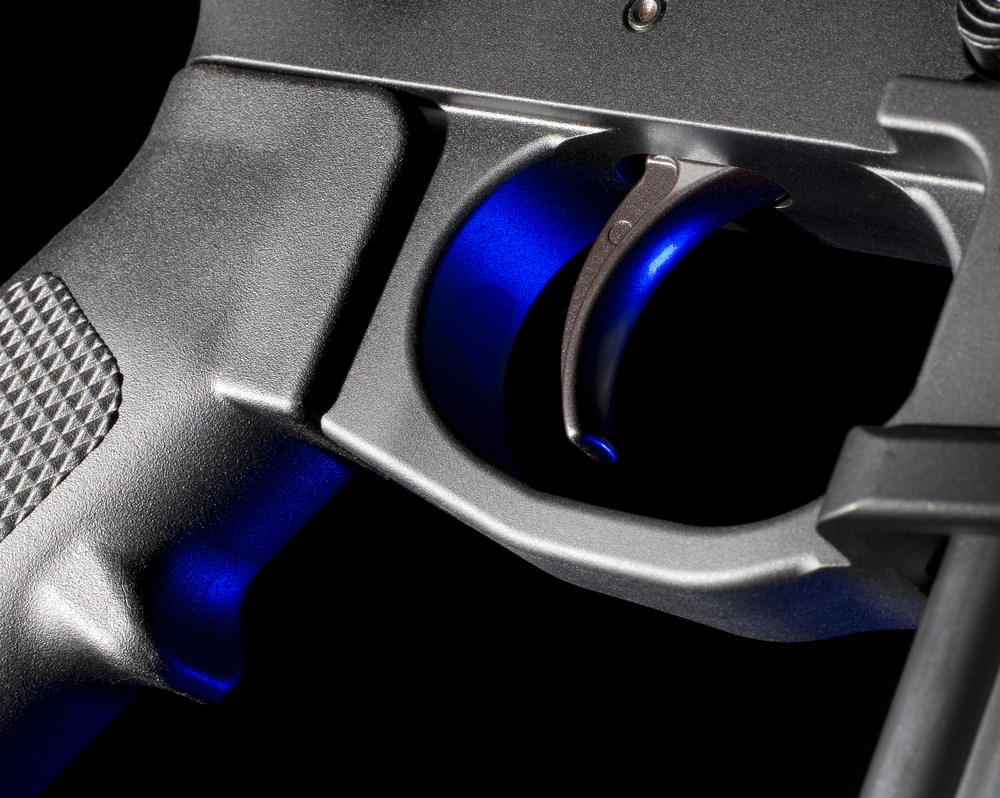
Your trigger might be the most important part affecting accuracy. The factory mil-spec triggers that come in basic lower parts kits work fine, but they're not great—often gritty with heavy pull weights around 6-8 pounds.
Upgraded triggers come in two main types:
- Single-stage: Just one clean break when you pull
- Two-stage: A light first stage followed by a crisp break
For precision shooting or competition, an upgraded trigger from brands like Geissele, LaRue, or Timney makes a world of difference. These usually run $80-200 but transform how your rifle shoots. Some have pull weights as low as 2.5 pounds with zero creep or grit.
The trigger is one part where spending extra money truly pays off in performance.
3. Stripped Lower
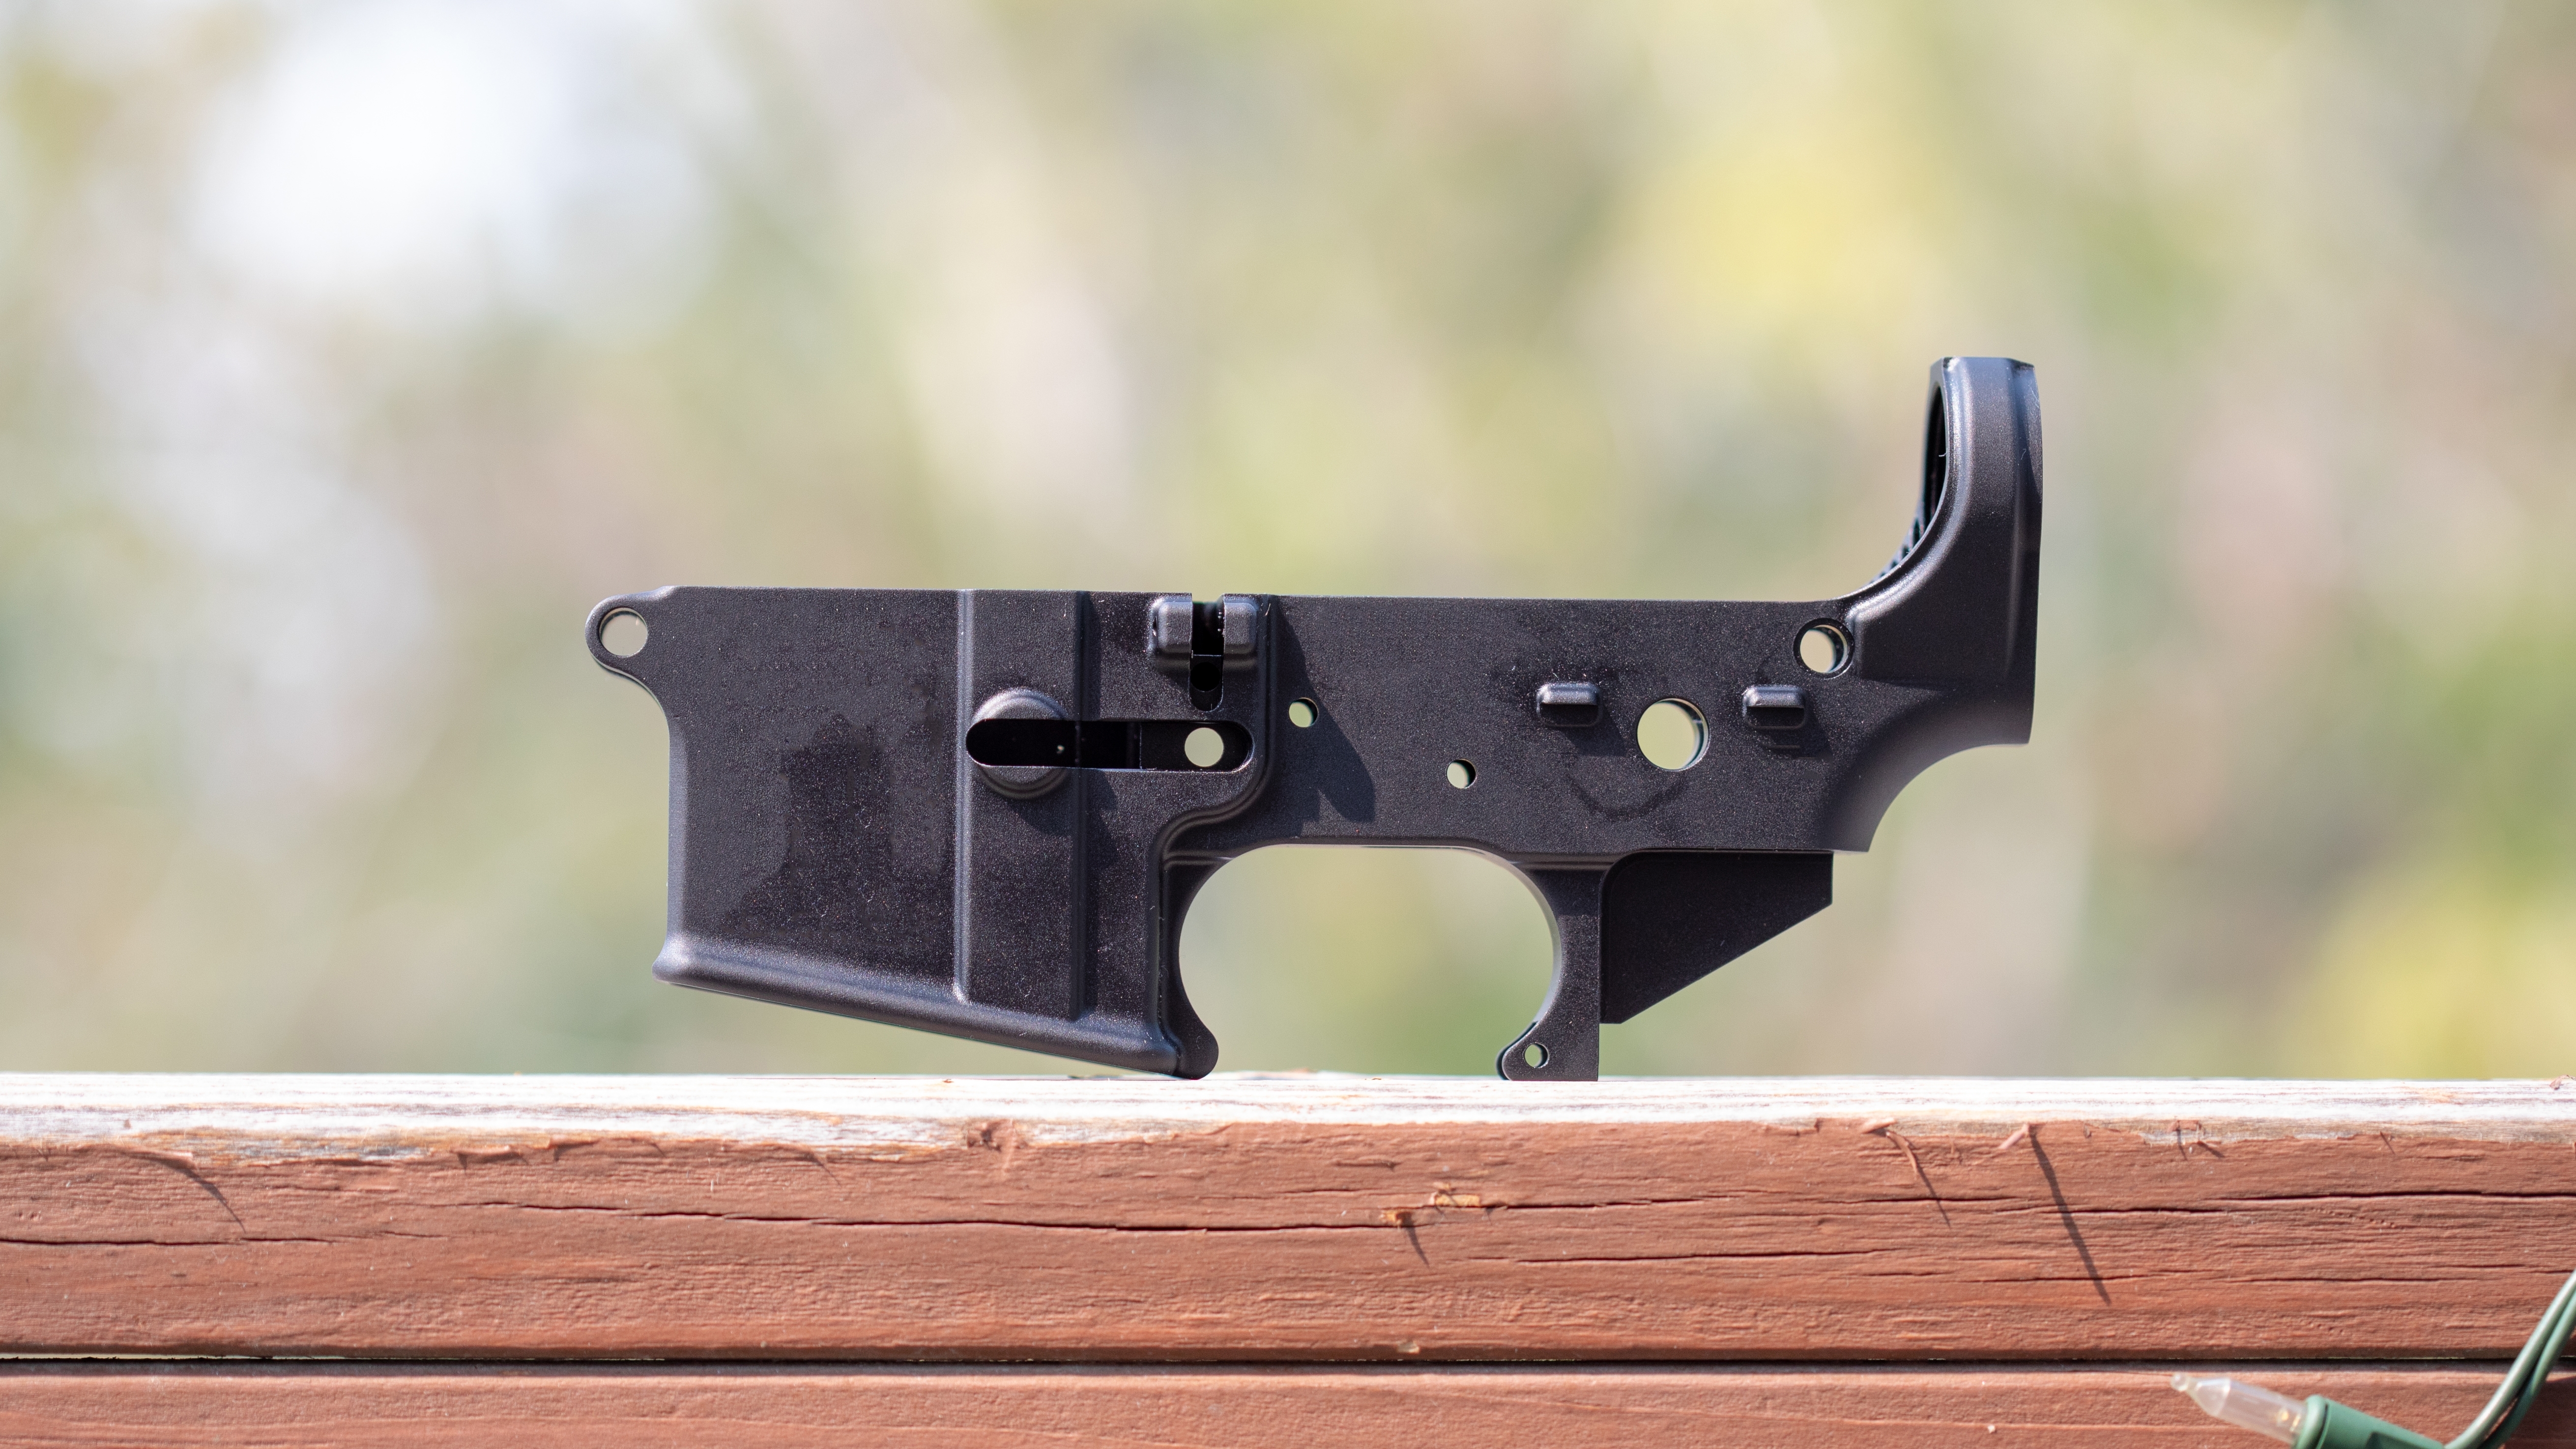
The stripped lower receiver is generally the only serialized part of your AR-15—legally speaking, this is your "firearm" under federal law. However, some states like California and Connecticut impose stricter regulations that may require serialization of additional components, such as unfinished receivers or 80% lowers. Always check your local laws to ensure compliance. Everything else can typically be shipped right to your door.
Most quality aluminum lowers perform similarly, so choose based on:
- Roll mark (the brand logo/design)
- Features like flared magwells or ambidextrous controls
- Price point
Popular options include lowers from Aero Precision, Anderson Manufacturing, and Spike's Tactical. Prices range from $50 for basic models to $300+ for premium billet lowers with extra features.
For most builds, a forged aluminum lower in the $75-120 range offers the best balance of quality and value.
4. Stock
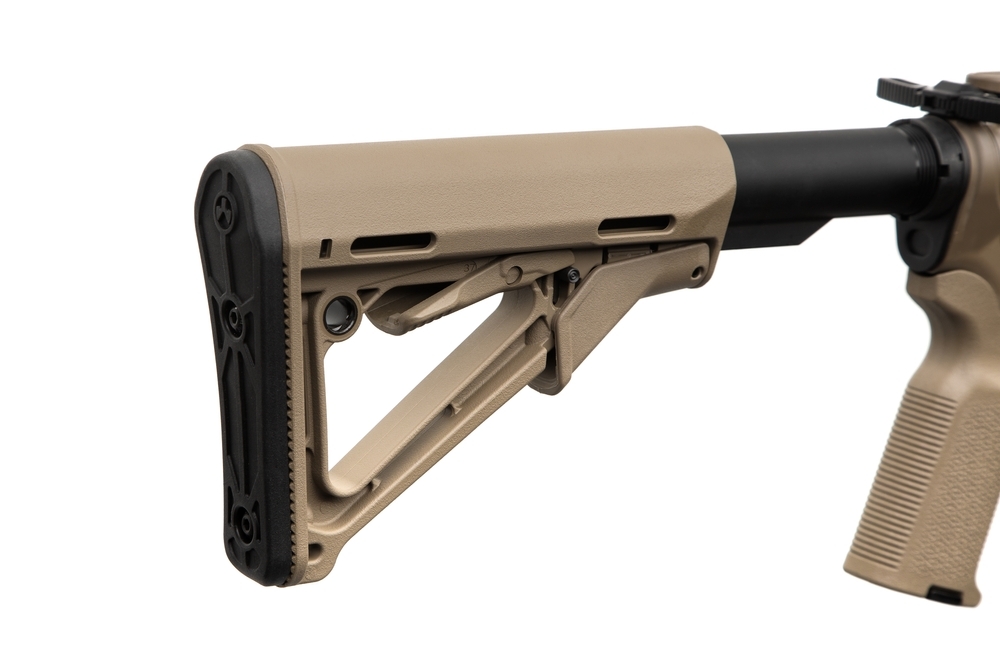
Your stock affects how the rifle shoulders and handles. Options fall into a few categories:
Fixed Stocks: Simple, sturdy options like the A2 stock or Magpul MOE Fixed Stock. Great for precision builds.
Adjustable Stocks: Most popular for their versatility. Can fit different shooters or adjust for different clothing (like heavy jackets). The Magpul CTR and B5 SOPMOD are excellent choices.
Precision Stocks: Options like the Magpul PRS have adjustable cheek risers and length of pull for precision shooting.
Pistol Braces: For AR pistol builds instead of stocks. Note: As of early 2025, the ATF has attempted to regulate braces under NFA rules, but court challenges have left the issue unsettled. Always check current federal and state laws before using a brace.
Match your stock to your purpose—lighter, more compact stocks for general use; heavier, adjustable ones for precision shooting.
5. Buffer Kit
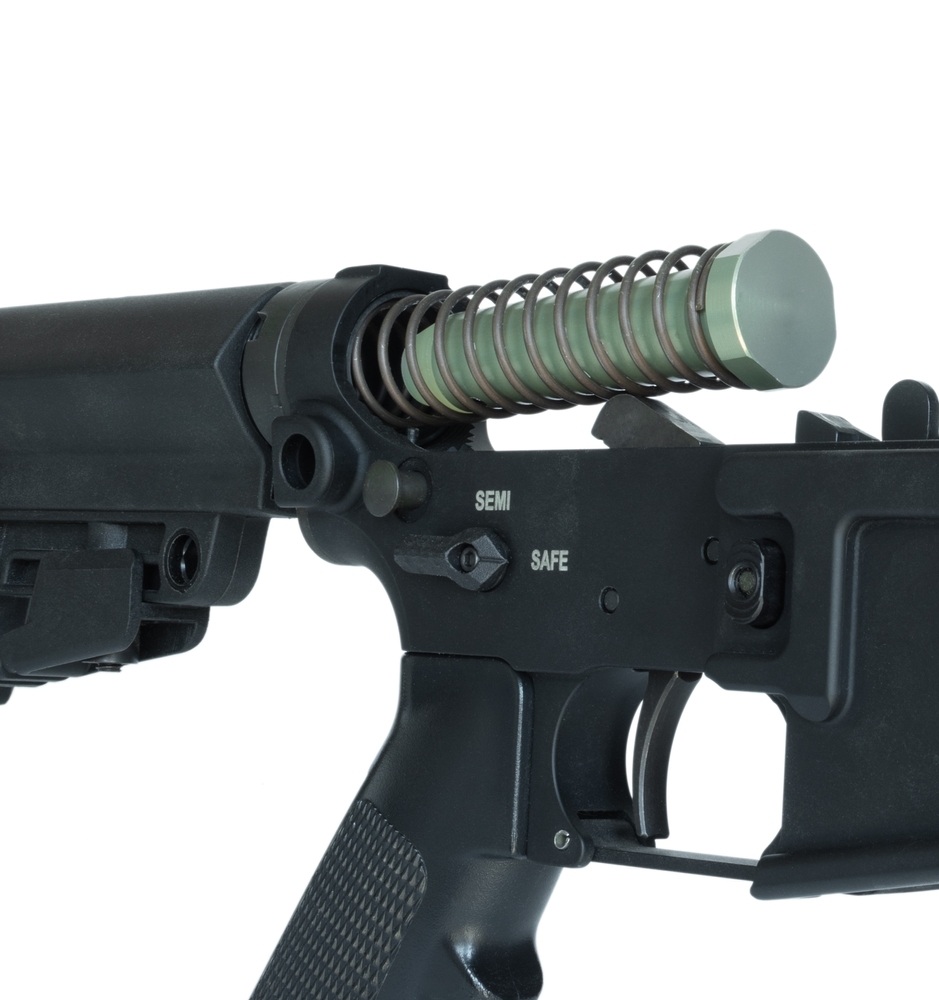
The buffer system manages recoil and helps your AR cycle reliably. A complete buffer kit includes:
- Buffer tube (receiver extension)
- Buffer spring
- Buffer weight
- Castle nut
- End plate
The buffer weight directly affects how your rifle cycles. Heavier buffers (H2, H3) reduce felt recoil but need more gas to cycle. Lighter buffers cycle easier but may increase recoil.
For most 16-inch barrel builds with carbine-length buffer tubes, a carbine or H1 buffer typically works well. Make sure to match your buffer system (carbine vs. rifle-length) to your stock and receiver extension. Using the wrong combination can cause cycling issues.
6. Lower Parts Kit
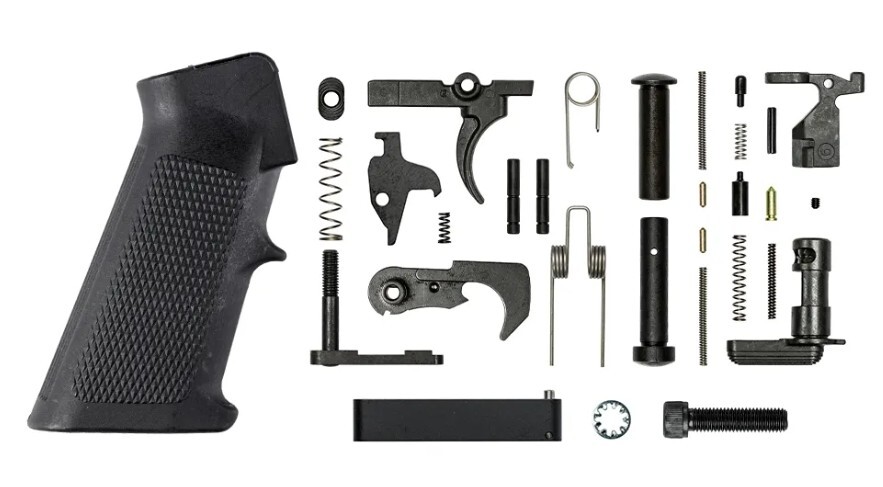
The lower parts kit (LPK) contains all the small pieces that make your lower work:
- Springs
- Detents
- Pins
- Selector switch
- Magazine release
- Bolt catch
- Trigger guard
Many kits include a basic trigger and grip, while "stripped" LPKs leave these out so you can add your own upgraded versions.
Quality matters here—these small parts control critical functions. Stick with reputable brands like CMMG, Aero Precision, or BCM for reliable performance.
AR-15 Upper Receiver Parts
1. Charging Handle

The charging handle lets you manually cycle your rifle to load or clear it. Standard mil-spec handles work fine, but upgraded versions offer:
- Larger latches for easier gripping
- Ambidextrous controls for lefties
- Gas-busting or redirecting designs that help reduce gas blowback when shooting suppressed—though results may vary depending on rifle configuration
The BCM Gunfighter and Radian Raptor are popular upgrades that make manipulating your rifle faster and more comfortable, especially with optics mounted.
Consider an ambidextrous handle even if you're right-handed—it gives you options when shooting from awkward positions or clearing malfunctions.
2. Dust Cover (Ejection Port Cover)
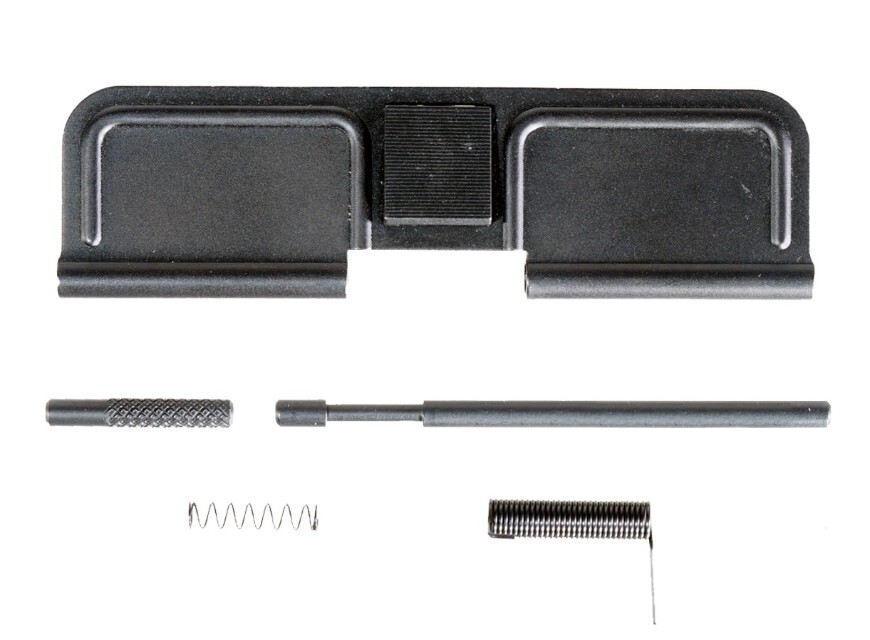
This small spring-loaded door snaps shut to keep dirt and debris out of your receiver when not firing. When you shoot, it automatically pops open.
While basic dust covers work fine, you can find custom options with phrases, logos, or designs that add personality to your build. Some uppers come with the dust cover already installed.
3. Muzzle Device

The muzzle device threads onto the end of your barrel and serves different purposes:
Flash Hiders: Reduce visible flash when shooting, especially in low light. The A2 bird cage is the standard option.
Compensators: Reduce muzzle rise by directing gas upward, helping you stay on target for fast follow-up shots.
Muzzle Brakes: Reduce felt recoil by venting gas to the sides, but typically increase noise and concussion.
Flash Suppressors: Hybrid devices that manage both flash and recoil.
For a do-everything rifle, a quality flash hider/compensator like the VG6 Gamma or SOLGW NOX offers a good balance of features.
Make sure to check if your state has restrictions on certain muzzle devices before buying.
4. Gas Tube
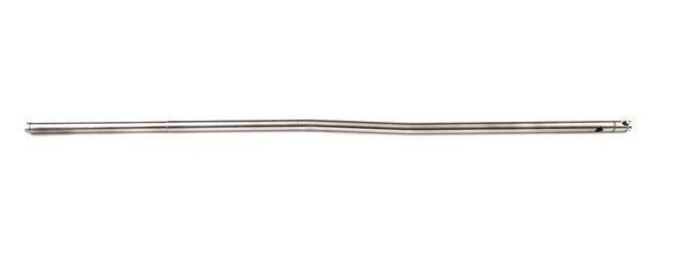
The gas tube connects your gas block to the upper receiver, carrying the gas that cycles your rifle. You'll need to match the gas tube length to your barrel:
- Pistol: Typically for barrels under ~10 inches
- Carbine: Common on 10.5" to 16" barrels (especially 14.5")
- Mid-length: Common on 14.5" to 18" barrels (especially 16")
- Rifle: Usually found on 18" and longer barrels (especially 20")
This is a simple part—just make sure to get the right length and a quality tube from a reputable manufacturer. Stainless steel tubes tend to last longer than plain steel.
5. Forward Assist
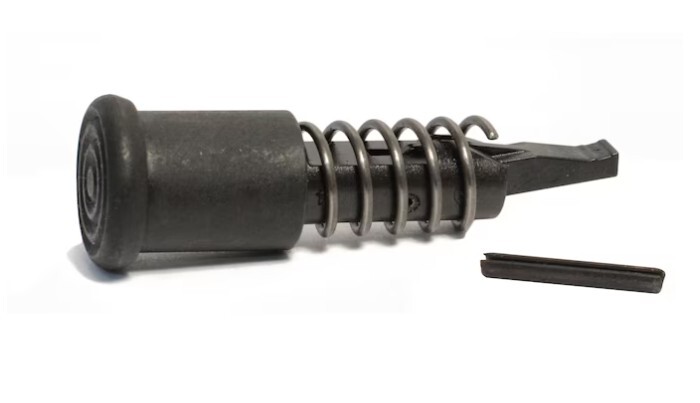
The forward assist lets you manually push your bolt carrier forward if it doesn't fully seat. It's a feature carried over from military rifles, originally intended to force the bolt closed in dirty environments. In civilian use, it's rarely needed and often debated. Some modern rifles omit it entirely for weight savings or simplicity.
Some builders opt for slick-side uppers without a forward assist to save weight and reduce snag points. For most general-purpose builds, having one doesn't hurt, but it's not essential.
If you're building for harsh environments where dirt and debris might affect cycling, keeping the forward assist might give you peace of mind.
6. Barrel
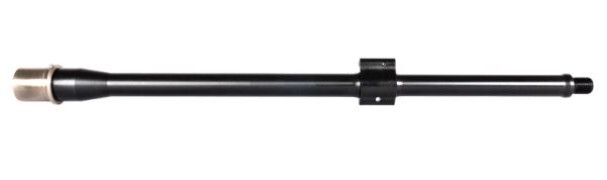
Your barrel has the biggest impact on accuracy, weight, and overall shooting characteristics. Key considerations include:
Length: Shorter barrels (10.5"-14.5") are more maneuverable but louder with more flash. Longer barrels (16"-20") give better velocity and range.
Profile: Lightweight "pencil" barrels save weight but heat up faster. Heavier profiles maintain accuracy during rapid fire but add weight.
Material: Standard chrome-moly vanadium (CMV) barrels work well for most users. These are typically stronger and more heat-resistant than plain chrome-moly barrels and are often used in duty-grade rifles.
Twist Rate: This determines what bullet weights work best. 1:7 or 1:8 twist rates handle heavier bullets well and are versatile choices.
For a first build, a 16" barrel with a mid-length gas system offers the best balance of performance and reliability. Faxon, Ballistic Advantage, and BCM make excellent barrels in the $150-250 range.
7. Bolt Carrier Group (BCG)
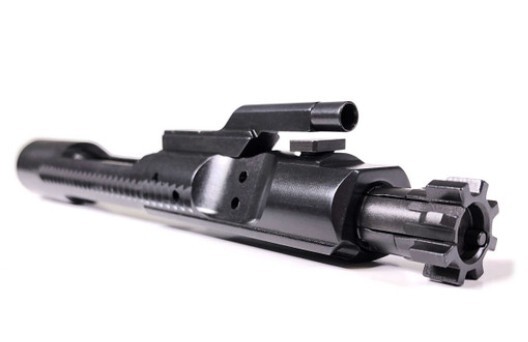
The bolt carrier group is the engine of your AR-15. It handles firing, extraction, and feeding new rounds. Quality matters here.
Full-auto vs. Semi-auto: Full-auto BCGs (which don't make your gun full-auto) are heavier and more durable. They're the standard choice for most builds.
Coatings: Options like nitride, nickel boron, and DLC reduce friction and make cleaning easier.
Weight: Standard BCGs work for most builds. Lightweight BCGs reduce felt recoil but may need adjustable gas systems to run reliably.
For most builds, a nitride-treated full-auto BCG from BCM, Toolcraft, or Aero Precision gives the best mix of reliability and value.
8. Gas Block
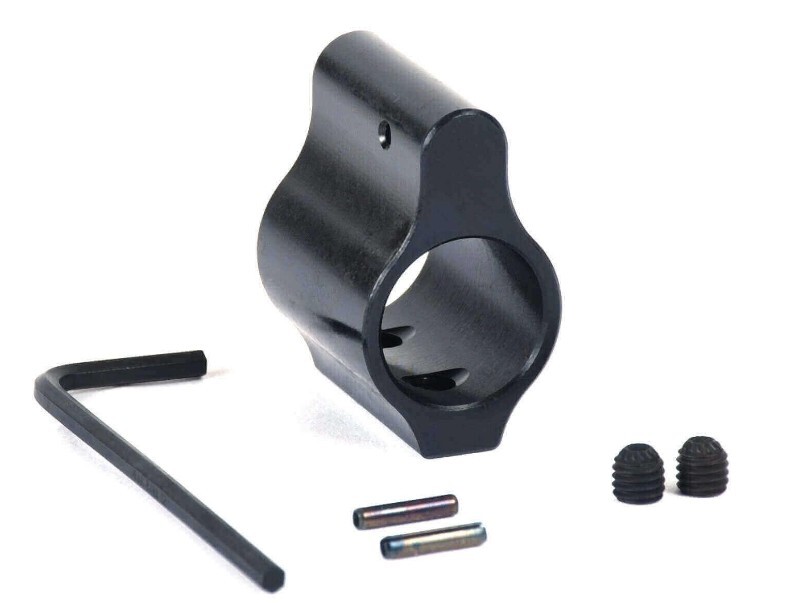
The gas block sits on your barrel and directs gas back through the gas tube to cycle your rifle. You have two main choices:
Standard Gas Blocks: Simple, fixed blocks that work well for most builds with properly gassed barrels.
Adjustable Gas Blocks: Let you fine-tune how much gas cycles your action. Helpful for suppressed rifles, non-standard ammunition, or lightweight builds.
For a first build, a quality fixed gas block works fine. If you're building something more specialized or plan to use a suppressor, an adjustable block from Superlative Arms or Seekins gives you more control.
Make sure to match the gas block diameter to your barrel—common sizes are .750" and .625".
9. Handguard
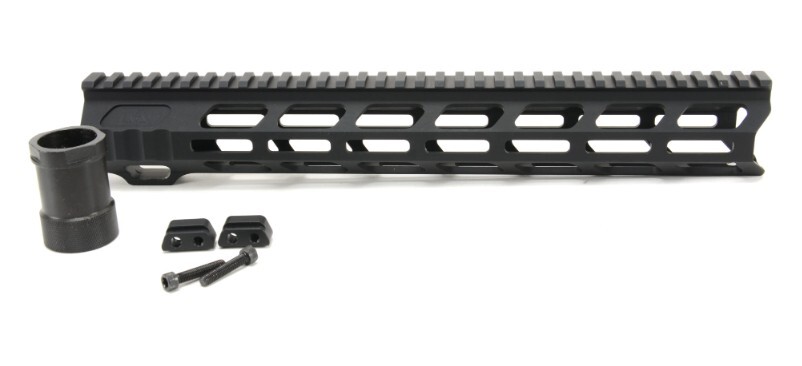
Your handguard surrounds the barrel, giving you a place to grip the rifle and mount accessories. Modern handguards use either M-LOK or KeyMod mounting systems, with M-LOK becoming the more popular standard.
Longer handguards let you extend your grip and mount more accessories, but add weight. Choose based on your planned use:
- 7"-9" for compact builds
- 10"-12" for general-purpose rifles
- 13"-15" for longer-range or precision builds
Quality handguards from BCM, Aero Precision, or Midwest Industries typically run $120-200 and offer the best balance of strength, weight, and features.
10. Stripped or Assembled Upper
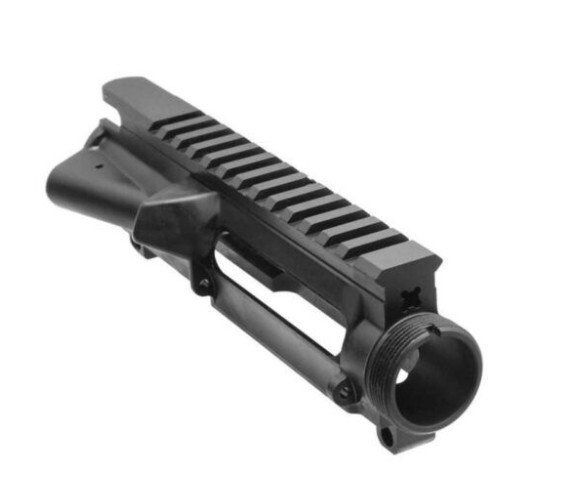
The upper receiver houses your bolt carrier group and attaches to your barrel. You have several options:
Stripped Upper: Just the basic receiver with no parts installed.
Assembled Upper: Comes with forward assist and dust cover already installed.
Complete Upper: Includes barrel, handguard, and all components ready to attach to a lower.
For first-time builders, an assembled upper makes sense—installing the forward assist and dust cover can be tricky. Aero Precision, BCM, and VLTOR make excellent uppers with good fit and finish.
Essential Tools for Building an AR-15
Having the right tools makes building your AR-15 much easier and helps prevent damage to your parts.
1. Roll-Pin Pusher / Drift Tool
Roll pins can be frustrating to install without the right tools. A dedicated roll-pin pusher set helps align and press these pins without marring your receiver's finish. This tool pays for itself in reduced frustration alone.
2. Armorer's Wrench
This multi-function tool handles several key tasks:
- Tightening the barrel nut
- Installing the castle nut
- Adjusting the muzzle device
The Magpul Armorer's Wrench is a popular choice that handles most common tasks and lasts for multiple builds.
3. Upper Vise Block
Securing your upper receiver properly is critical when installing the barrel. Using the wrong methods can bend or damage your upper. A quality vise block holds the upper securely and prevents damage during high-torque operations.
4. C-Clamp
Sometimes simpler is better. A basic set of C-clamps helps hold parts in place while installing roll pins and other small components. A pack of three different sizes costs less than $15 and helps tremendously.
5. Vise
A sturdy bench vise gives you a stable platform for your build. While specialized gunsmithing vises exist, any solid vise with smooth jaws works fine for AR builds. Just add some electrical tape to the jaws to prevent marring.
6. Hex Key Set
Many handguards, gas blocks, and accessories use hex screws. A good set of hex wrenches in both standard and metric sizes ensures you can install everything properly. Bondhus makes excellent hex keys that don't strip easily.
7. Lower Vise Block
Similar to the upper block, this holds your lower receiver securely during assembly. Some designs clamp directly into the vise, while others insert into the magwell and then fit into the vise. Both types work well for different preferences, but magwell blocks are easier for beginners.
8. Pin Punches (Brass)
Brass punches are softer than steel. Therefore it makes them less likely to scratch your receiver when installing pins. A set with various sizes from 1/16" to 1/4" covers all the pins in an AR build.
9. Utility Knife
Believe it or not, a sharp utility knife helps install tricky detent pins. The flat edge can hold spring-loaded detents in place while you slide parts together. It's an unusual but incredibly helpful trick that experienced builders swear by.
Basic Assembly Steps for Your AR-15
Building an AR-15 isn't rocket science, but it does require patience and attention to detail. Here's a quick rundown of the process:
Lower Receiver Assembly:
- Start by installing the magazine catch and release button
- Add the bolt catch with its spring and roll pin (use tape to prevent scratches)
- Install the trigger group, connecting the hammer and trigger with their pins
- Add the safety selector lever and grip (the grip holds a detent spring in place)
- Install the buffer tube assembly, securing it with the castle nut
Upper Receiver Assembly:
- Mount the barrel to the upper receiver using the barrel nut
- Install the gas block and gas tube, aligning them precisely with the barrel port
- Attach your handguard of choice
- Drop in the bolt carrier group and charging handle
Pro tip: Work in a clean area with good lighting. Place a towel down to catch any springs or detents that try to escape. Some builders even work inside a large, clear plastic tub to contain flying parts!
Remember that proper torque and alignment of the barrel nut (usually 30–80 ft-lbs, depending on the barrel nut type) and correct staking of the castle nut are critical for safety and long-term function. Use a torque wrench and follow manufacturer specs.
Conclusion
Building your own AR-15 gives you complete control over every aspect of your rifle. Start with quality parts from reputable manufacturers, and don't skimp on critical components like the barrel, bolt carrier group, and trigger.
For beginners, consider starting with a complete upper receiver for your first build—this simplifies the process while still giving you the experience of assembling the lower receiver, which contains most of the mechanical parts.
Always check your local laws before building. Some states have restrictions on features like adjustable stocks, pistol grips, and certain muzzle devices.
Remember that building takes patience. Set aside plenty of time, follow detailed guides, and don't rush. The result is a rifle built exactly to your specifications—and the satisfaction of knowing you built it yourself.
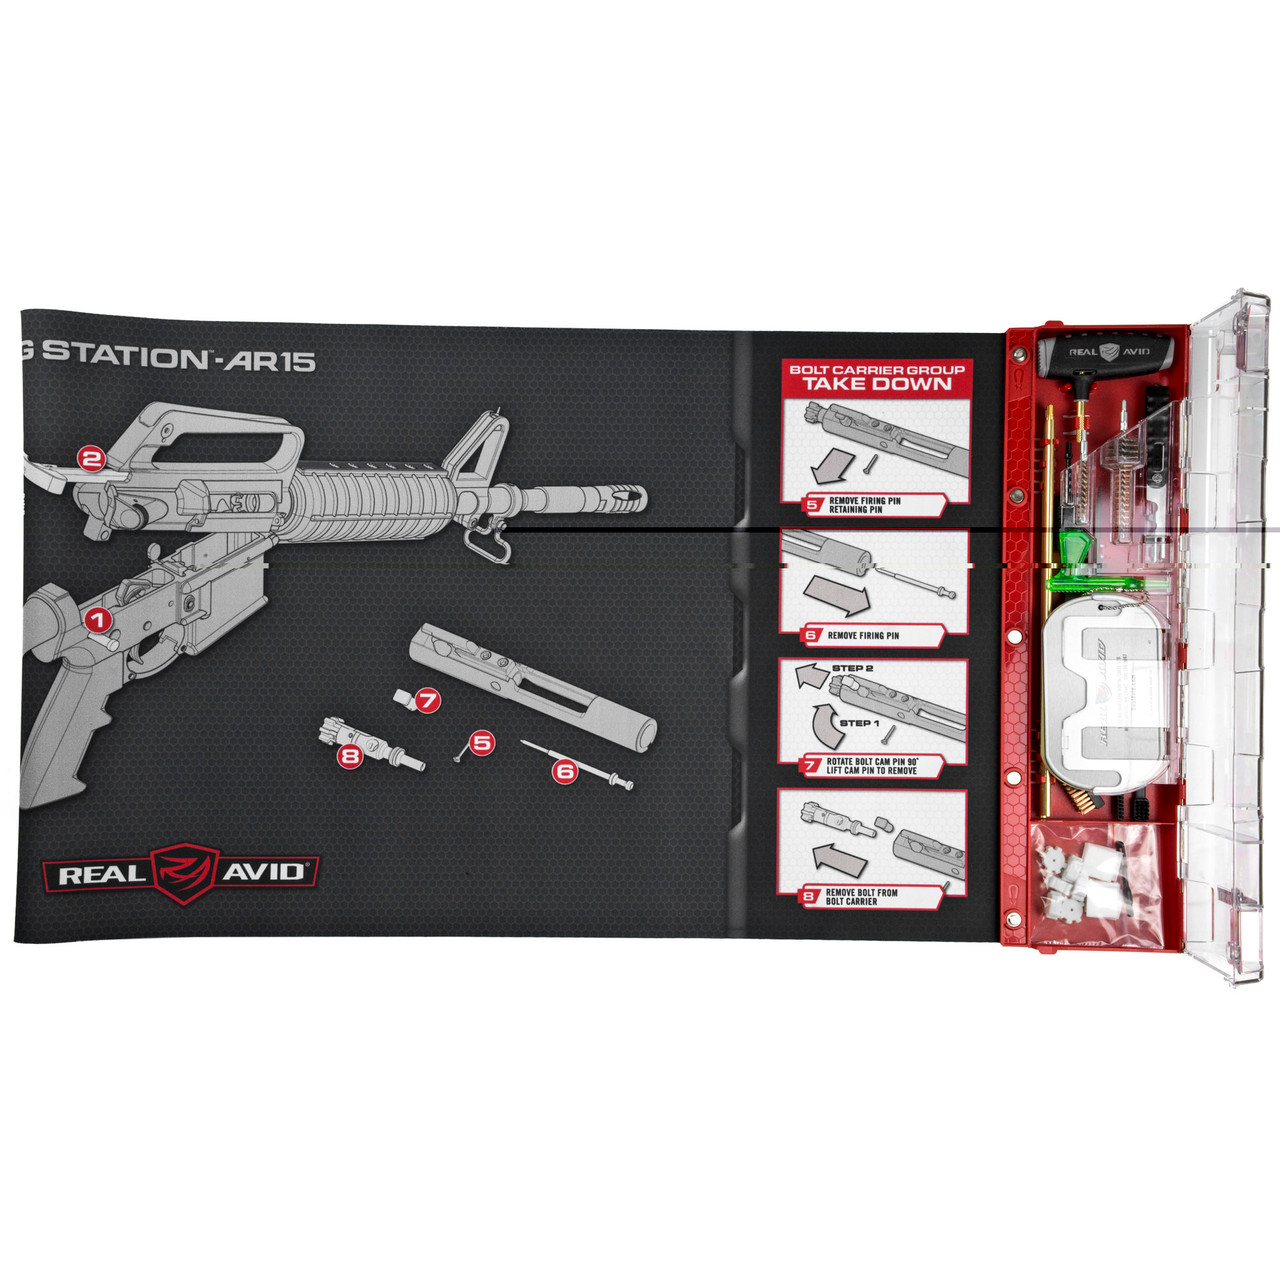
Real Avid Master Cleaning Station -a
$79.99
at Pro Armory
Prices accurate at time of writing
Frequently Asked Questions
Do I need a gunsmith to build an AR-15?
No! With basic mechanical skills and the right tools, you can build an AR-15 at home. The design is modular and intended for easy assembly. Just take your time and follow detailed guides.
Is it cheaper to build or buy an AR-15?
Building usually saves money, especially if you shop sales and build exactly what you want from the start. Buying premade often costs more, but comes with a warranty and guaranteed function.
Do I need to register a home-built AR-15?
This depends entirely on your state laws. The lower receiver is the only serialized part legally considered a "firearm." Check your local regulations before building.
What's the most difficult part of building an AR-15?
Most builders find installing the bolt catch roll pin and the front pivot pin detent/spring the trickiest parts. Take extra time with these steps and use the right tools.
How long does it take to build an AR-15?
First-time builders typically need 2-3 hours to assemble a lower receiver and 1-2 hours for an upper (if starting with a stripped upper). With practice, you can complete a build in under an hour.
Can I mix and match parts from different manufacturers?
Yes! The AR platform is standardized, so parts from different manufacturers typically work together. However, some premium brands are machined for tighter tolerances and may work best with their matching components.

Best Ammo Deals, Training, & Accessories
Subscribe to ProArmory sales and deals email.


")
")


 for Faster Split Times")


